How to Set Up a Wall Tent Elk Camp in Montana
Setting up a comfortable and functional elk camp in the vast, often unforgiving landscapes of Montana can be a daunting challenge, especially when you're looking to spend extended periods deep in the wilderness. The logistics of creating a temporary home that offers warmth, shelter, and a base for your hunting adventures requires careful planning and the right gear. This comprehensive guide will walk you through everything you need to know about establishing a durable and cozy wall tent elk camp, ensuring your focus stays on the hunt and not on battling the elements.
Why a Wall Tent for Your Montana Elk Camp?
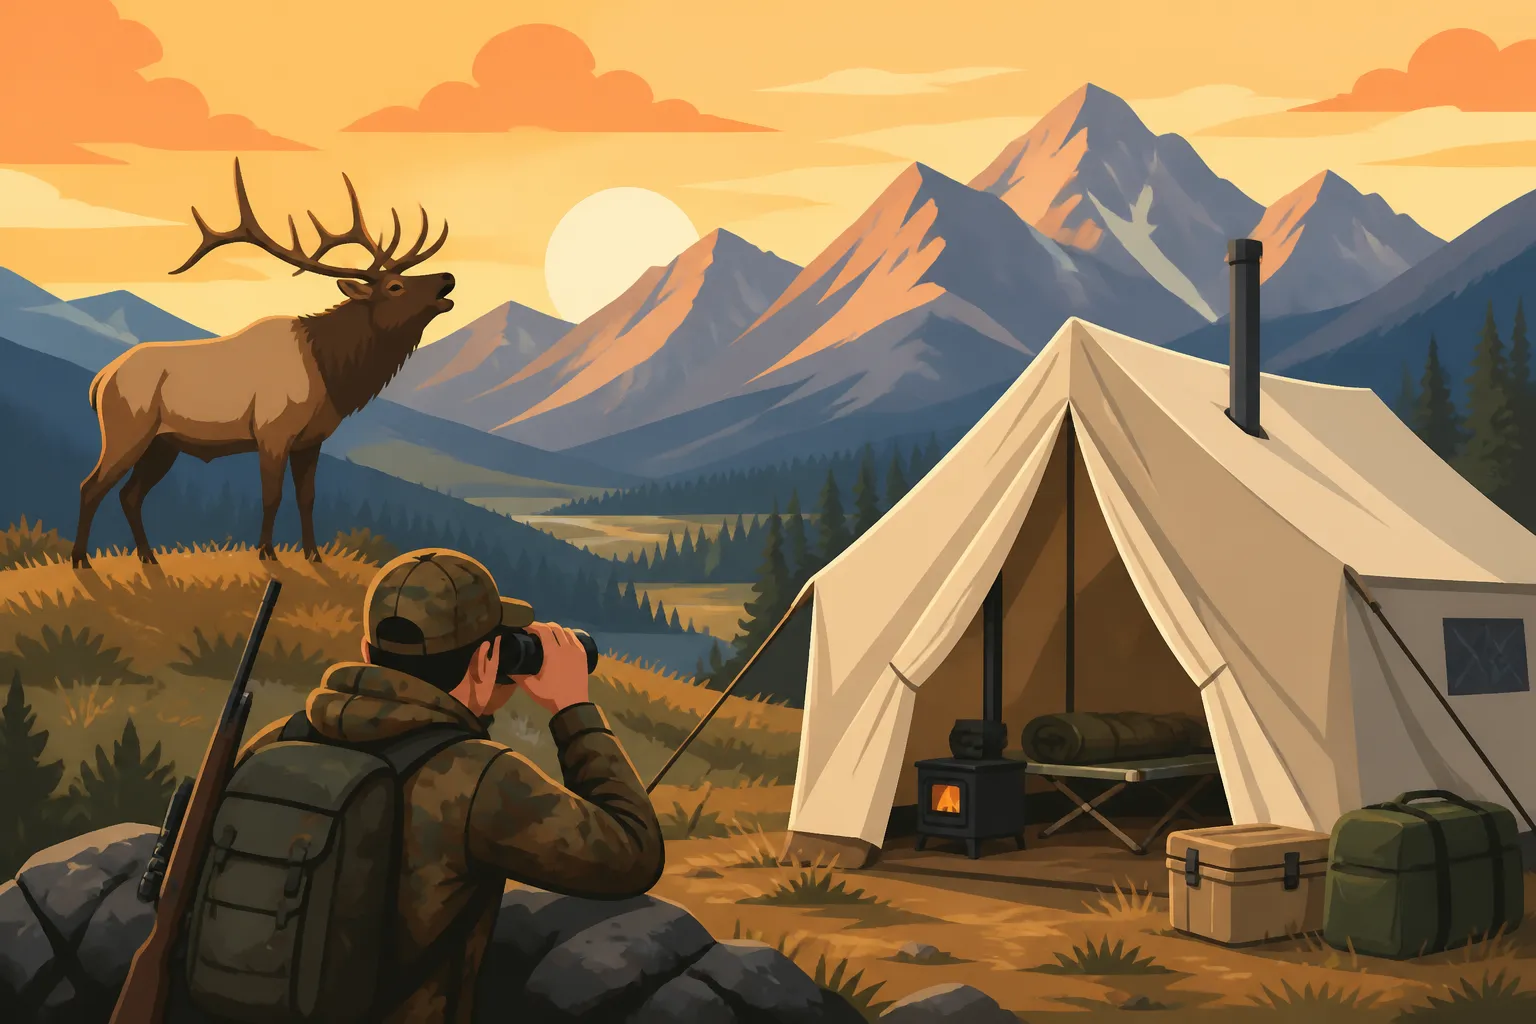
When you envision a classic Western hunting camp, chances are a sturdy wall tent comes to mind. There's a reason these canvas behemoths have been a staple for generations of hunters in places like Montana: they offer a level of comfort and resilience that smaller, modern tents simply can't match, especially when you're out for days or even weeks.
The Comfort Factor in Harsh Conditions
Let's be honest, hunting in Montana often means facing unpredictable weather. One day you might be enjoying crisp, sunny autumn air, and the next you could be slogging through wet snow or battling sub-zero temperatures. A lightweight backpacking tent, while great for mobility, offers minimal respite from these conditions. A wall tent, on the other hand, provides a true refuge. Its heavy-duty canvas, when properly pitched and paired with a wood-burning stove, creates a warm, dry environment where you can dry wet gear, cook a hot meal in comfort, and get a solid night's sleep without shivering. This isn't just about luxury; it's about maintaining morale, staying healthy, and ensuring you're rested and ready for the physical demands of elk hunting each day. Imagine coming back to camp after a long, cold day on the mountain, peeling off your wet outer layers, and stepping into a roaring fire's warmth – it's a game-changer for overall hunt success and enjoyment.
Durability and Longevity
Wall tents are built to last. Made from heavy-duty canvas, often treated for water, mildew, and fire resistance, they are designed to withstand significant wind, snow loads, and prolonged exposure to the elements. Unlike nylon or polyester tents that can degrade under UV exposure or tear easily on sharp branches, a well-maintained canvas wall tent can provide decades of reliable service. This durability means you can leave your camp set up for the entire duration of your hunt without worrying about it collapsing in a squall or being shredded by high winds while you're out pursuing elk. This robustness is particularly valuable for hunters who frequent the same areas year after year, as the initial investment pays off over time in terms of reliability and reduced replacement costs. Plus, the sheer weight and material density also contribute to better insulation compared to thinner synthetic fabrics, further enhancing your camp's comfort and energy efficiency when heated.
Essential Components of Your Wall Tent Setup
Building a functional wall tent camp is about more than just pitching the canvas. It requires a thoughtful assembly of components that work together to create a true backcountry home. Each piece plays a critical role in your comfort, safety, and overall hunting experience.
The Tent Itself and Frame Options
First and foremost, you need the wall tent itself. These typically range in size from 8×10 feet for a solo hunter or a tight duo, up to 14×16 or even larger for multiple hunters or those who appreciate extra space for gear and a cooking area. Consider the number of people in your party, the amount of gear you'll have, and how long you plan to stay when choosing your tent size. A larger tent means more warmth to generate, but also more room to spread out.
When it comes to the frame, you generally have a few options:
- Internal Frame: This is often the most popular choice for ease of setup and stability. These frames are typically made from aluminum or steel poles that assemble inside the tent, creating a rigid structure that supports the canvas. They are fantastic for handling snow loads and high winds. Brands like Davis Tent and White Duck Outdoors offer excellent internal frame kits that are custom-fit to their tents. The advantage here is not needing to search for poles or cut trees, which is especially important if you're in an area with timber restrictions or sparse trees.
- External Frame: Less common for traditional wall tents, but some designs utilize an external frame. These can offer a bit more interior space but might be slightly less stable in extreme wind compared to a well-tensioned internal frame.
- DIY Log/Picket Frame: For the true traditionalist or those on a budget who are hunting in timbered areas, you can cut your own lodgepole pine or similar straight timber to create a custom frame. This requires a saw, some ingenuity, and careful measurements, but it's a very sturdy and cost-effective option if you have the resources and time. Remember, always check local regulations for cutting timber on public land, and only harvest deadfall or designated trees with the proper permits. This method is often preferred for more permanent camps or if you're packing in with horses where the weight of a metal frame is prohibitive.
Regardless of your frame choice, ensure the canvas is robust. Look for treated canvas (water, mildew, fire retardant) and reinforced stress points. Heavy-duty zippers and storm flaps are also critical for enduring Montana's demanding weather.
Heating Your Home Away from Home
A wall tent without a stove is just a canvas box. The stove is the heart of your elk camp, providing warmth, a place to dry gear, and a surface for cooking.
- Wood-Burning Stoves: This is the classic choice for a reason. They provide incredible heat, can burn for hours, and the crackle of a wood fire adds an undeniable charm to camp. They come in various sizes and gauges of steel, from lightweight packable versions (like those from Kni-Co Manufacturing) to heavier, more durable models. You'll need a stovepipe that extends safely out of the tent, typically through a stove jack in the roof or a side window. Safety is paramount with wood stoves. Always use a spark arrestor on your stovepipe, place the stove on a fire-resistant mat (or at least shovel dirt under it), and keep combustibles well away from the stove. Most importantly, carry a carbon monoxide detector and ensure proper ventilation. Nothing is worth risking your life over. You'll also need a good saw and axe for processing firewood.
- Propane Stoves: While less common for primary heating in wall tents due to their high fuel consumption, some hunters use catalytic propane heaters for quick, supplemental heat or if firewood is scarce. If using propane, ensure it's a model rated for indoor use and has an oxygen depletion sensor. Again, a carbon monoxide detector is non-negotiable with any fuel-burning appliance inside a tent. The convenience is appealing, but the cost and weight of propane cylinders for extended trips can add up quickly.
Sleeping Systems and Camp Furnishings
Getting good rest after a grueling day of hunting is crucial. Your sleeping setup should prioritize warmth and comfort.
- Cots: A cot elevates you off the cold ground, which makes a significant difference in warmth and overall comfort. Look for sturdy, packable cots. Combine this with a thick sleeping pad (like those from Big Agnes or Therm-a-Rest) for insulation and an even comfier surface.
- Sleeping Bags: Choose a sleeping bag rated well below the coldest temperatures you expect to encounter. Even in early archery season, Montana nights can dip surprisingly low. A zero-degree bag is a safe bet for most fall elk hunts. Consider layering a sleeping bag liner for extra warmth and to keep your bag clean.
- Pillows: Don't forget a comfortable pillow! A small inflatable pillow or even just stuffing your camp clothes into a stuff sack can work wonders for your neck.
- Chairs and Tables: Collapsible camp chairs and a small table make a huge difference for comfort. They provide a place to sit, eat, process maps (perhaps from resources like GoHunt), and organize small gear items. A few milk crates can also serve as versatile seating, storage, and small tables.
Cooking and Food Storage
A well-organized kitchen area is vital for a happy camp.
- Camp Kitchen: Whether it's a designated corner in your wall tent or a separate pop-up kitchen tent, plan for an efficient cooking space. Your stove will provide a cooking surface, but a separate two-burner propane camp stove (like a Camp Chef Explorer) is excellent for quick meals or if you don't want to fire up the wood stove.
- Cookware and Utensils: Bring durable, lightweight cookware suitable for camp cooking. A cast iron pan is heavy but great over a wood stove. Don't forget plates, bowls, cups, and utensils.
- Food Storage: Bear safety is non-negotiable in Montana. All food, scented items, and cooking gear must be stored properly to prevent attracting bears and other critters. This means using bear-resistant containers (like a sturdy cooler with a lock or certified bear canisters), hanging food from a tree at least 10-12 feet high and 4 feet from the trunk, or storing it in your vehicle a good distance from camp. Never store food in your wall tent. Keep your cooking area clean and free of food scraps. This proactive approach ensures both your safety and the safety of the wildlife.
- Water: Access to water is critical. You'll need plenty for drinking, cooking, and cleaning. Plan to bring a water filter (Sawyer Squeeze or Katadyn BeFree are popular) or purification tablets if you're near a reliable water source. Carry large water jugs for storage in camp.
Choosing the Right Location for Your Camp
Picking the perfect spot for your wall tent can make or break your hunting experience. It's not just about aesthetics; it's about safety, practicality, and proximity to elk activity.
Water, Fuel, and Protection from the Elements
When scouting potential camp locations, keep these critical factors in mind:
- Water Source: This is paramount. Look for a reliable, year-round water source like a stream, river, or spring. Being able to easily access water for drinking, cooking, and washing saves immense time and effort. Always filter or treat backcountry water, even if it looks pristine. Don't set up your tent directly on a streambank, as flash floods can occur, and it's generally not good for riparian areas.
- Firewood (Fuel): If you're using a wood stove, proximity to abundant dead and down timber is a huge advantage. Hauling firewood long distances is exhausting. Again, be mindful of local regulations regarding firewood collection.
- Protection from Wind and Snow: Seek out natural shelters. A stand of mature timber, a large rock outcrop, or a depression in the terrain can offer significant protection from prevailing winds and heavy snowfall. Avoid exposed ridges or wide-open meadows where winds can be brutal. Consider the sun's path; a spot that gets morning sun can help warm the tent and dry dew.
- Drainage: Always pitch your tent on high, well-drained ground. Imagine a heavy downpour or melting snow. You don't want water pooling under or around your tent, leading to a miserable, wet experience. Look for subtle rises in the terrain or areas with sandy/gravelly soil that drain quickly. Avoid setting up in low spots, dry creek beds (which can become raging torrents), or directly in game trails.
Accessibility and Game Management
Beyond the immediate environmental factors, consider the logistical and strategic aspects of your camp's location.
- Road Access vs. Backcountry: Decide whether you need vehicle access or if you're packing into a true wilderness area. If vehicle access is important, look for established pull-offs or forest service roads. If you're backpacking or using horses, your camp will likely be deeper, requiring more planning for packing in your gear. For those really going deep, understanding Montana Backcountry Hunting Guide is essential.
- Proximity to Hunting Grounds: You want your camp to be close enough to your target hunting areas to minimize travel time, but not so close that your presence spooks game. Ideally, a camp should be within a reasonable walk or horseback ride to good elk habitat, such as feeding areas, bedding grounds, or water sources. Using tools like GoHunt or other mapping software can help you identify these areas and plan your access routes. Avoid setting up camp directly on major game trails or in known migration corridors, as this can disrupt natural animal movement.
- Minimal Impact: Adhere to Leave No Trace principles. Choose durable surfaces for your camp, like dry ground or rock. Avoid fragile vegetation. Distribute impact by not creating "trails" directly from your tent door. When you break down camp, leave the area as if you were never there. This includes scattering ashes, packing out all trash, and naturalizing any disturbed ground.
Step-by-Step Wall Tent Setup
Once you've chosen your ideal location, the actual pitching of the tent requires a systematic approach to ensure it's secure, safe, and comfortable. Don't rush this process, especially if bad weather is on the horizon.
Site Preparation and Layout
Before you even unroll the canvas, take the time to prepare your chosen site properly. This initial effort will pay dividends in comfort and stability.
- Clear the Area: Remove any sharp sticks, rocks, or debris from the footprint where your tent will sit. These can puncture the tent floor (if you use one) or make for uncomfortable sleeping. Also, clear a safety perimeter around the tent for fire prevention, especially if you'll be using a wood stove.
- Level the Ground: While finding perfectly flat ground in Montana's mountains is rare, do your best to level out major humps and fill in small depressions within your tent's footprint. This will make walking, sleeping, and setting up cots much more comfortable.
- Orient the Tent: Consider the prevailing wind direction and the sun. Ideally, you want the tent opening facing away from strong winds to prevent drafts and make entry/exit easier. Morning sun can be nice for warmth, but afternoon sun might be too hot in early season. If you plan to set up a specific cooking or gear drying area, orient the tent to accommodate these.
- Mark the Footprint: Lay out your tent to get a visual of its size and ensure it fits the cleared and leveled area. This also helps you visualize where your frame will go.
Erecting the Frame and Canvas
With the site prepped, it's time to put up the structure. This is often a two-person job, especially for larger tents.
- Assemble the Frame: If using an internal aluminum or steel frame, assemble the pieces according to the manufacturer's instructions. Lay it out on the ground in the general shape of your tent. Ensure all connections are secure. For those interested in Montana DIY Elk Hunting Guide, learning to build your own log frame is a valuable skill, but often reserved for more permanent camps or those packing in with stock.
- Drape the Canvas: Carefully unfold your canvas tent over the assembled frame. Pay attention to the door and stove jack placement. It's often easiest to unfold it lengthwise over the ridge pole first, then spread it out over the side poles.
- Attach the Tent to the Frame: Secure the tent to the frame using the ties, clips, or buckles provided. Ensure it's centered and taut.
- Raise the Tent: This is where an internal frame shines. Once the canvas is draped and attached, you simply lift the frame into its upright position. If you're building a log frame, you'll erect the corner posts and ridge pole first, then drape and secure the canvas.
- Stake and Guy Out: This is a crucial step for stability. Drive heavy-duty stakes (snow stakes or rebar stakes work well in tough Montana ground) into the ground around the tent perimeter. Attach guy ropes to the loops on the tent and pull them taut, securing them to the stakes. Aim for a 45-degree angle from the tent for optimal stability. Ensure there's good tension on all lines to prevent flapping in the wind. A properly guyed-out wall tent can withstand impressive winds.
Stove Installation and Safety
Getting your stove set up safely is paramount.
- Position the Stove: Place your wood stove on its designated spot, ideally near the back or a side wall, away from the door and main traffic flow. Ensure it's on a non-combustible base (dirt, sand, or a fire-resistant mat).
- Assemble Stovepipe: Connect the stovepipe sections, ensuring they are tightly fitted. Extend the pipe through the stove jack in the tent roof or wall. The stove jack should be made of a high-temperature silicone or similar material.
- Secure Stovepipe: Use stovepipe rings or wire to secure the pipe sections and prevent them from separating. Ensure the pipe is vertical (if through the roof) or angled appropriately (if through the wall) and extends well clear of the tent fabric.
- Install Spark Arrestor: Attach the spark arrestor to the top of the stovepipe. This prevents embers from landing on your tent and starting a fire. Clean it regularly.
- Carbon Monoxide Detector: Place your carbon monoxide detector inside the tent, ideally at sleeping level. Test it before your hunt and carry spare batteries. Never, ever operate a wood stove or propane heater without a working CO detector.
- Ventilation: Even with a stove, ensure adequate ventilation. The stovepipe itself provides some draft, but leaving a door or window slightly ajar, especially when the stove is roaring, is a good practice to prevent CO buildup.
Interior Organization and Final Touches
With the structure up and stove safe, it's time to make it feel like home.
- Set Up Sleeping Systems: Arrange cots, sleeping pads, and sleeping bags. Ensure enough space to move around.
- Organize Gear: Create designated areas for wet gear, dry clothes, cooking supplies, and hunting essentials. Use tubs, duffel bags, or shelves to keep things tidy. A small clothesline inside the tent can be invaluable for drying socks and base layers. This is also where you might reference your Montana Backcountry Hunting Gear List.
- Kitchen Area: If cooking inside, set up your camp kitchen stove, food prep surface, and water containers in a safe, efficient manner, keeping them clear of the tent walls and stove. Remember to keep all food and scented items in bear-resistant containers and store them outside the tent, well away from camp.
- Lighting: Hang lanterns (propane, battery, or solar powered) for ambient light. Headlamps are essential for personal lighting.
- First Aid and Emergency: Keep your first aid kit easily accessible and clearly marked. Have a fire extinguisher or a bucket of sand/dirt readily available near the stove. It's also wise to have a satellite communication device or a reliable GPS unit, like those found on GoHunt, to stay connected or signal for help in remote Montana areas.
Maintenance and Breaking Down Camp
A wall tent is a significant investment, and proper care ensures its longevity. Equally important is leaving your camp area pristine when your hunt concludes.
Keeping Your Tent in Top Shape
During your hunt, a little preventative maintenance goes a long way.
- Check Guy Lines and Stakes: Winds can loosen stakes and guy lines. Regularly walk around your tent and check the tension. Re-tighten or re-drive stakes as needed, especially after heavy winds or rain.
- Monitor Stovepipe: Ensure the stovepipe remains securely connected and doesn't get clogged with creosote buildup. Clean the spark arrestor daily to maintain good draft and prevent dangerous spark emissions.
- Ventilation and Condensation: While canvas breathes better than synthetic materials, condensation can still occur. Ensure some airflow to minimize moisture buildup, especially if you're drying wet clothes inside.
- Address Tears Promptly: Small tears or holes in the canvas should be patched as soon as possible to prevent them from growing larger. Carry a canvas repair kit with durable adhesive patches.
- Snow Load Management: If a heavy snow falls, periodically push snow off the roof to prevent excessive weight buildup, which could stress or even collapse your frame.
Leaving No Trace
Montana's wilderness is a precious resource, and it's every hunter's responsibility to protect it. When it's time to head home, follow these guidelines to leave your camp spot better than you found it.
- Pack it In, Pack it Out: Every single piece of trash, food scrap, and non-natural item must be packed out with you. This includes small items like cigarette butts, spent casings, and even fruit peels. "If you brought it in, it goes out." This principle is fundamental to ethical Montana Public Land Hunting Strategy.
- Deal with Fire Remains: Allow your wood stove to cool completely. Collect all ashes and scatter them widely in thick vegetation or pack them out if required by specific land management regulations. Never bury ashes, as they can smolder for days. Naturalize any burnt ground.
- Disassemble Carefully: Take down your wall tent and frame in reverse order of assembly. Fold the canvas neatly and cleanly. Ensure all frame components are accounted for.
- Rehabilitate the Site: Once the tent is down, inspect the ground. If you dug a fire pit (which is often discouraged in favor of a contained stove), fill it back in and naturalize the area. Rake out any depressions caused by cots or gear. Scatter any remaining debris (like small twigs or leaves) to make the area look undisturbed. The goal is for someone else to pass through your former campsite and have no idea you were ever there. This commitment to conservation is part of the spirit of hunting in Montana.
Essential Wall Tent Camp Gear Checklist
To help you get started, here's a table summarizing the essential items for your Montana wall tent elk camp.
| Category | Essential Items | Notes |
|---|---|---|
| Shelter | Wall Tent (canvas), Internal/External Frame, Stakes, Guy Ropes | Choose size based on party. Heavy-duty canvas, treated for water/fire. |
| Heating | Wood-Burning Stove, Stovepipe, Spark Arrestor, Stove Jack, Carbon Monoxide Detector | Essential for warmth and drying. CO detector is non-negotiable. Fire-resistant mat recommended. |
| Sleeping | Cots, Sleeping Pads, Cold-Weather Sleeping Bags, Pillows | Elevate off ground. Sleeping bag rated for extreme cold. |
| Cooking & Food | Camp Stove (propane/wood), Cookware, Utensils, Plates/Bowls/Cups, Bear-Resistant Coolers/Containers, Water Filter/Purifier, Water Jugs, Camp Table, Camp Chairs | Critically important for bear safety. Always filter water. Keep cooking area clean. |
| Tools & Misc. | Axe, Saw (bow saw/chainsaw for firewood), Shovel, First Aid Kit, Repair Kit (tent/stove), Lanterns/Headlamps, Fire Extinguisher (small), Garbage Bags, Rope/Cordage, Satellite Communicator/GPS | For firewood, camp maintenance, emergencies. GPS/Comms essential for safety in remote areas. Consider a sturdy hunting knife. |
| Personal Gear | Layered Clothing, Rain Gear, Quality Boots, Map & Compass, Optics, Hunting License/Tags | Beyond camp, these are crucial for the hunt itself. Remember to check Montana Elk Season Dates Guide and have your Montana Nonresident License Draw Explained in order. |
Setting up a robust wall tent camp might seem like a lot of work, but the comfort and self-sufficiency it provides in the Montana wilderness are truly invaluable. It transforms a challenging hunt into an immersive, rewarding experience, allowing you to focus on pursuing elk, knowing you have a warm, dry home base awaiting your return.
Disclaimer
The information provided in this guide is for general informational purposes only and does not constitute professional advice. Hunting regulations, safety protocols, and wilderness conditions can change rapidly. Always consult the latest Montana Fish, Wildlife & Parks regulations, local land management agencies, and professional guides or outfitters for the most accurate and up-to-date information before planning any hunting trip. Wilderness activities carry inherent risks, and participants should be adequately prepared and trained.