How to Pack Out an Elk in Montana
Alright, let's talk about the moment every elk hunter dreams of and simultaneously dreads: having an elk on the ground deep in the Montana backcountry. You've done the hard part – located, stalked, and made a good shot – but now the real work begins. The sheer scale of an adult elk, coupled with Montana's notoriously rugged terrain and the ticking clock of meat spoilage, can make the pack out feel like an impossible feat. This guide is going to walk you through everything you need to know to get that hard-earned meat from the mountain back to your freezer, piece by excruciating, glorious piece.
The Reality of Packing Out an Elk in Montana
Let's be brutally honest: packing out an elk in Montana is one of the most physically demanding things you'll ever do. It’s not like hauling a whitetail a couple hundred yards to the truck. This is a true test of grit, planning, and often, sheer willpower. Many a hunter has found themselves staring at a downed bull, adrenaline fading, and the daunting reality of the pack out setting in. Don't let that be you without a solid plan.
Understanding the Challenge: Weight and Distance
An average adult cow elk can weigh anywhere from 300 to 500 pounds, with mature bulls often tipping the scales at 600 to 900 pounds, or even more. When you break that down into quarters, backstraps, tenderloins, and neck meat, you're looking at anywhere from 150 to 250 pounds of usable meat, bones included, that needs to be carried out. Each quarter, especially a bone-in hindquarter from a bull, can easily weigh 70-100 pounds.
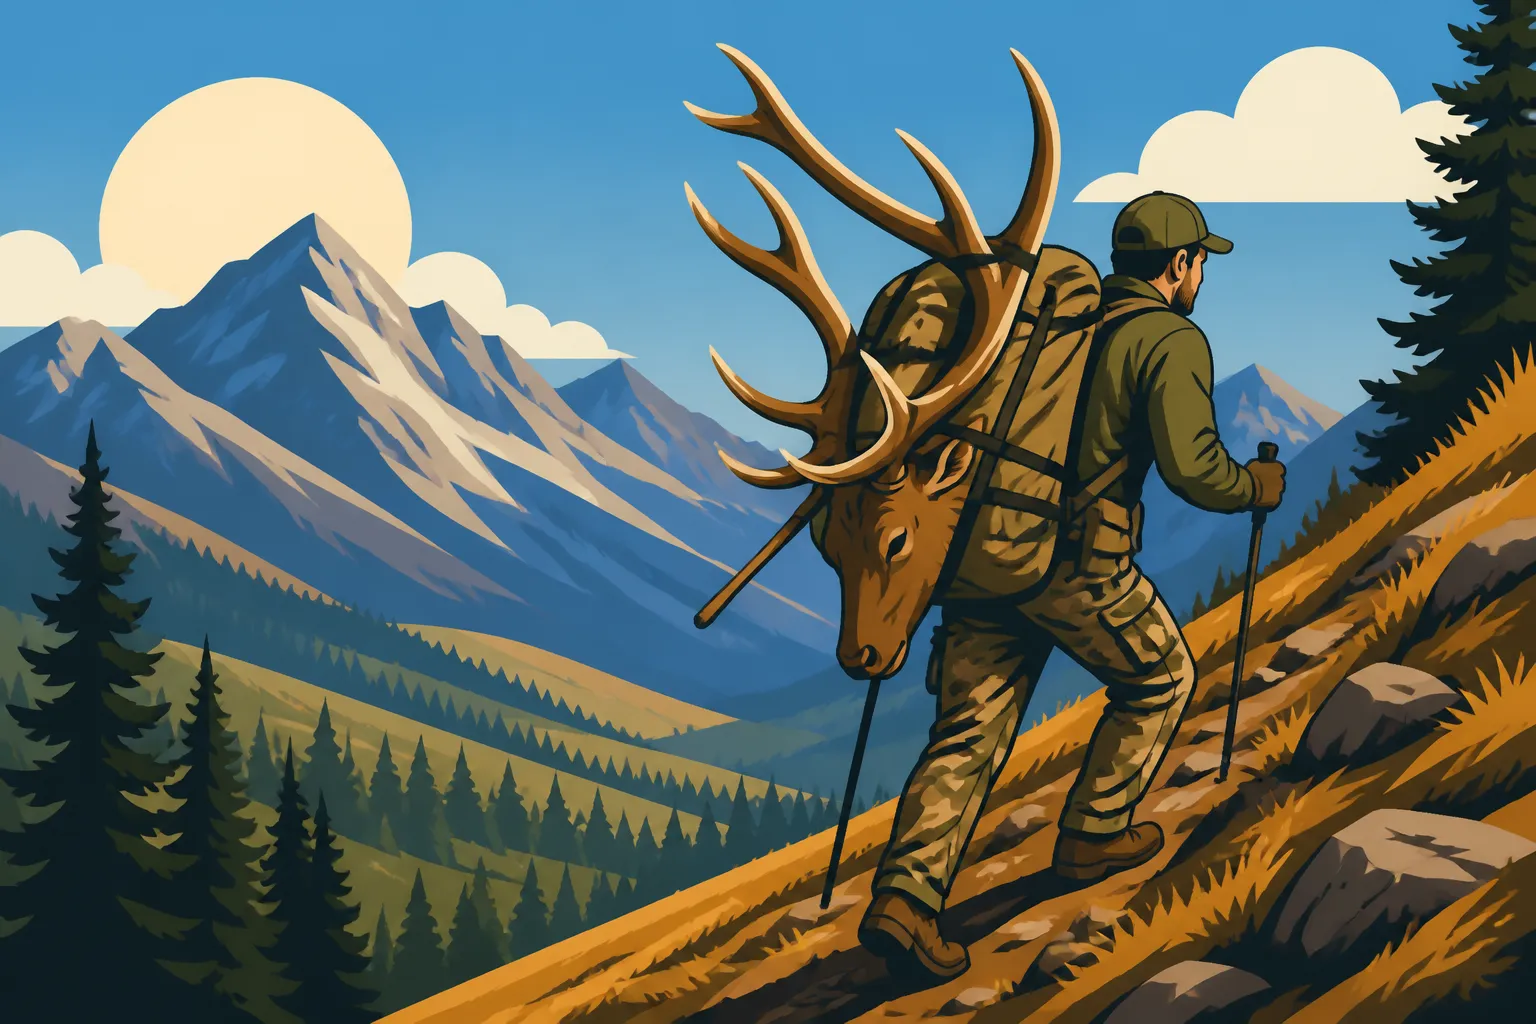
Now, imagine carrying that weight over distances that can range from a half-mile to five or even ten miles, often uphill, downhill, through thick timber, or across rocky slopes. A typical pack out involves multiple trips, sometimes two to three for a solo hunter, and even with a partner, it's rare to get everything out in a single haul unless you're incredibly close to a road and have lightweight gear. The physical toll is immense; your shoulders, back, and legs will burn, and your mental fortitude will be pushed to its limits. This isn't just about strength; it's about endurance and a stubborn refusal to quit. For tips on getting ready, check out our guide on How to Physically Prepare for a Montana Elk Hunt.
The Time Crunch: Keeping Meat Cool
Montana's diverse climate means that the urgency of cooling meat can vary dramatically. During early archery season, especially in September, daytime temperatures can still climb into the 70s or even 80s Fahrenheit. In these conditions, time is absolutely critical. Elk meat can begin to spoil surprisingly quickly if not cooled. Bacteria thrive in warm, moist environments, and a large, warm carcass is a perfect incubator. You typically have a window of a few hours, maybe 4-6 hours in warm weather, to get that body heat out of the meat before spoilage becomes a serious concern.
Even in rifle season, when October and November bring colder temperatures, a large animal retains heat for a long time. The internal temperature of a freshly killed elk can be over 100°F. Getting the hide off, breaking the animal down, and getting the individual pieces into breathable game bags is paramount to facilitate cooling. Neglecting this step can mean losing perfectly good meat, which is perhaps the greatest tragedy after a successful hunt. For more specific advice, our article on How to Keep Elk Meat Cool in Montana's Early Season has some excellent strategies.
Terrain and Environmental Factors
Montana's landscape is stunningly beautiful but incredibly unforgiving when you're hauling hundreds of pounds of meat. The Rocky Mountain Front, the Bitterroot, the Custer Gallatin – these areas are defined by steep, rugged mountains, deep canyons, and vast expanses of dark timber. What looks like a short distance on a map can translate into hours of painstaking travel over uneven ground, downed trees, and loose scree.
Thick lodgepole pine stands, prevalent throughout much of Montana's elk country, can become an impenetrable maze, obscuring visibility and making navigation difficult, especially with a massive pack on your back. River and creek crossings, often swollen by rain or snowmelt, add another layer of danger. Then there's the weather: blazing sun, torrential rain, or heavy snow can appear rapidly, further complicating your efforts. Knowing your chosen hunting district and its typical terrain can make a huge difference, so definitely consult resources like How to Choose a Montana Hunting District during your planning phase. Being prepared for these elements isn't just about comfort; it's about safety and successfully recovering your harvest.
Essential Gear for an Elk Pack Out
You wouldn't head into the backcountry without your rifle or bow, and you certainly shouldn't go without the right gear to pack out an elk. The gear you carry for the pack out is just as vital as your hunting equipment, and often, it's one and the same. Investing in quality, purpose-built gear can literally be the difference between success and a costly, exhausting failure.
Backpacks Built for Hauling
Your hunting pack needs to be a workhorse, not just a daypack. When selecting a backpack, think about its capacity, frame, and suspension system. For elk, you're looking at packs designed to handle extreme loads, typically 80 pounds and up. Brands like Kifaru, Stone Glacier, and Mystery Ranch are leaders in this space, known for their robust external and internal frames that effectively transfer weight to your hips, protecting your shoulders.
Look for features like a dedicated meat shelf or expandable load sling, which allows you to sandwich quarters between the frame and the main pack bag, keeping the bulk of the weight close to your back. Adjustable torso lengths, thick hip belts, and load lifter straps are crucial for customizing the fit and maintaining comfort under heavy loads. A good pack should feel like an extension of your body, not an anchor. Trust me, a cheap pack will make you regret every single step, while a quality pack, though expensive, is worth every penny the moment you cinch down 100 pounds of elk. For a deeper dive, check out our Best Backpack for a Montana Elk Hunt guide.
Game Bags: Not All Are Created Equal
This is one area where many new hunters cut corners, and it’s a huge mistake. Forget the old pillowcases or cheesecloth. You need breathable, durable game bags that protect your meat from dirt, insects, and drying out, while still allowing it to cool efficiently. High-quality game bags are typically made from a synthetic blend that's light, strong, reusable, and allows airflow.
Brands like TAG (Textile Applications Group), Alaskan Game Bags, and Caribou Gear offer excellent options. These bags are designed to hold an entire quarter, often with enough room to keep it bone-in if desired. They come in various sizes and are often brightly colored (e.g., orange) to make your meat easier to spot if you're staging it on the mountain. The breathability is key to forming a protective "rind" on the meat, which keeps it fresh longer. You'll need at least four large bags for the main quarters, plus smaller bags for backstraps, tenderloins, and miscellaneous meat.
Cutting Tools and Processing Essentials
When it comes to breaking down an elk, sharp tools are your best friend. A good fixed-blade knife, roughly 3-4 inches long, made from high-quality steel (like S30V or similar), is indispensable. It should be easy to grip, even when bloody or wet. Many hunters also carry a replaceable blade knife, such as a Havalon or Outdoor Edge Razor-Lite, for skinning and fine work. These knives offer scalpel-like sharpness without the need for field sharpening, which is a huge advantage.
Don't forget a small, lightweight bone saw. This is invaluable for tasks like splitting the pelvis if you're going with a traditional gutting method, or for separating the spine from the ribs if you're taking rib meat. A sharpener for your fixed blade knife, such as a small diamond plate or ceramic stick, is also a good idea. Finally, always pack several pairs of disposable nitrile or latex gloves. Not only do they keep things sanitary, but they also provide a better grip and protect your hands from cuts and abrasions when working with a knife on a slippery carcass.
Safety and Navigation Aids
Beyond the tools for the elk itself, you need to think about your safety. Packing out an elk often happens in low light or darkness, under immense fatigue. A reliable headlamp (or two, with spare batteries) is non-negotiable. Flagging tape is incredibly useful for marking your trail, especially if you're making multiple trips or hunting in dense timber. You can mark your entry point, the location of your elk, and any staged meat.
A GPS device or a smartphone with a reliable hunting app like GoHunt or onX Hunt is absolutely crucial. These tools not only help you navigate to and from your elk but also allow you to mark waypoints for your kill site, staged meat, and your route. A satellite communicator like a Garmin inReach is also highly recommended. It allows you to send text messages and call for help even without cell service, which is common in Montana's vast wilderness. Lastly, a comprehensive first-aid kit, capable of treating everything from small cuts to more serious injuries, should always be in your pack. A twisted ankle or a deep cut far from the trailhead becomes a much bigger problem when you're already exhausted and loaded down with meat. Don't underestimate the power of good e-scouting, either; our guide on How to E-Scout Montana Hunting Units can help you plan your extraction route even before you leave home.
Field Dressing and Quartering Your Elk
Once you've knelt beside your downed elk, taken a moment to appreciate the animal, and tagged it according to Montana FWP regulations, it's time to get to work. The speed and efficiency with which you break down the animal will directly impact the quality of your meat. There are a couple of primary methods for this, each with its advantages.
Gutless Method vs. Traditional Gutting
The traditional gutting method involves opening the body cavity, removing all internal organs, and then skinning and quartering the animal. While effective, it's often messy, heavy on the stomach contents, and can be challenging on steep terrain. It also requires you to handle a lot of entrails, which can make things more difficult in warm weather.
For most backcountry elk hunters in Montana, the "gutless method" has become the preferred approach. This technique involves skinning and removing the four main quarters, backstraps, and tenderloins without ever opening the body cavity or dealing with the guts. It's cleaner, faster, and significantly reduces the weight you have to handle initially. You work one side of the animal at a time, keeping the guts contained, which is a huge advantage, especially when gravity is not your friend on a mountainside. This method is also less appealing to scavengers in the short term, as the entrails remain within the carcass.
Breaking Down the Carcass into Packable Pieces
Regardless of the method, the goal is to get the animal into manageable, packable pieces. Here's a general breakdown of what you'll be aiming for:
- Skinning: Start by skinning the animal, either fully or one side at a time if using the gutless method. Laying the hide skin-side down can create a clean work surface for placing meat.
- Hindquarters: These are typically removed first. For the gutless method, you cut around the leg, separate the hip joint, and then work your knife down between the large muscle groups, peeling the quarter away from the spine. You can leave the bone in for extra protection against dirt and easier handling, or debone them entirely to save weight. Many hunters choose to leave the bone in on the first trip to save time.
- Front Quarters: Similar to the hindquarters, but easier as they are only attached by muscle and connective tissue, not a ball-and-socket joint. Just cut around the shoulder and peel them off.
- Backstraps: These are the long, prime cuts of meat running along both sides of the spine, from the shoulders to the pelvis. Carefully cut along the top of the spine and then along the ribs to free these valuable cuts.
- Tenderloins: If you're using the gutless method, accessing the tenderloins (the small, cylindrical muscles inside the body cavity along the spine) requires reaching into the cavity through the hindquarters' removal point or making a small incision. If you're doing a traditional gut and retrieve, they are easily accessible.
- Neck Meat and Rib Meat: Don't forget these! The neck often holds a significant amount of excellent burger meat, and the rib meat, while tedious to remove, is also delicious. Use your knife or bone saw to remove sections of rib meat.
Each piece should go immediately into a clean game bag. For detailed, step-by-step instructions, our guide on How to Quarter an Elk in the Montana Backcountry is an invaluable resource.
Tagging and Keeping the Meat Clean
Montana Fish, Wildlife & Parks (FWP) regulations are very clear: you must validate your tag immediately after an animal is harvested and attach it to the largest portion of the carcass or head. If you're breaking the animal down, you’ll typically attach the tag to one of the hindquarters. Ensure the tag is secure and visible. You'll also need to retain evidence of sex, usually by leaving the antlered head with the tag, or some part of the sex organs if it's an antlerless animal, until the meat is processed.
Keeping the meat clean is paramount. Dirt, pine needles, hair, and blood are all contaminants. Work methodically and try to keep your knives clean between cuts. If possible, lay out a clean tarp or the inside of the hide, hair-side down, to place meat on before bagging. Once in game bags, hang the meat off the ground if you can. This allows for better airflow, protects it from ground moisture and insects, and keeps it away from small scavengers. Carry some flagging tape to mark the location of your staged meat, especially if you're leaving it overnight or making multiple trips.
The Packing Strategy: Making Multiple Trips
Unless your elk drops within sight of your truck and you have a sturdy game cart or an ATV trail nearby, packing out an elk is almost always a multi-trip affair. This isn't a sign of weakness; it's a realistic approach to a monumental task. Planning these trips efficiently can save you time, energy, and ensure the best quality meat.
Planning Your Loads
Before you even lift a single piece of meat, take a moment to strategize. Assess your physical condition, the number of people in your hunting party, and the terrain. A solo hunter will naturally have to make more trips than a group of three or four. The average hunter can comfortably carry 60-80 pounds in a good pack, though some athletes can push 100-120 pounds for shorter distances. Be realistic about your own capabilities. Overloading yourself not only increases the risk of injury but also slows you down considerably, potentially jeopardizing the meat.
Consider your route. Are there any natural breaks or flatter sections where you can pause? Will you be going primarily uphill or downhill? Plan your loads to distribute weight evenly and comfortably within your pack frame. Utilizing the load shelf of your pack and cinching everything down tight prevents shifting, which can throw you off balance and strain your back.
The First Trip: What to Take Out First
The first trip is often the most critical. You want to prioritize the most valuable and perishable meat. For most hunters, this means the backstraps and two hindquarters. Backstraps are prime cuts and relatively easy to spoil if not cooled. Hindquarters are the largest, heaviest cuts and hold significant value.
If you're hunting solo, you might take one hindquarter and both backstraps on your first trip, aiming for a load that's heavy but manageable enough to move quickly. With a partner, each of you can take a hindquarter and some smaller cuts, or one of you might take two hindquarters. The goal is to get as much high-value meat off the mountain and cooling as possible in that initial push. Remember, that initial walk back to the vehicle is also your best chance to clearly mark your trail with flagging tape, making subsequent trips much easier. This is also a good opportunity to use GPS to mark your kill site and the meat cache.
Staging and Securing Remaining Meat
Once you’ve packed out the first load, you'll need a plan for the remaining meat. The key here is protection from both heat and scavengers.
- Hang the Meat: If possible, hang the game bags from sturdy tree branches, high enough that bears and other ground predators (coyotes, wolves, mountain lions) can't easily reach them. This also allows for maximum airflow around the bags, crucial for cooling.
- Strategic Placement: If hanging isn't feasible, place the game-bagged meat in the coolest, shadiest spot you can find, such as a north-facing slope, in a rock crevice, or near a cold stream. Cover it with branches, rocks, or even a tarp to camouflage it and add a layer of insulation from direct sunlight.
- Scent Control: While impossible to eliminate, minimizing scent can help. Don't leave blood trails or discarded gut piles near your meat cache. Bears have an incredible sense of smell, and a meat cache is a strong attractant.
- Mark Clearly: Use plenty of bright flagging tape around the area, marking trees in multiple directions, not just your exit route. This makes it much easier to find your way back, especially in low light or fog. A GPS waypoint is your best friend here.
- Alert Authorities: If you're leaving meat overnight in bear country, especially grizzly bear country, it's often a good idea to notify the local FWP office. They appreciate knowing about potential attractants and can offer advice for your specific area.
This staging process ensures that the meat you worked so hard for is protected while you're away, ready for your next grueling trip.
Executing the Pack Out: Tips for Success
The pack out itself is a test of physical and mental endurance. It's not a sprint; it's a marathon, often run over some of the most challenging terrain imaginable. Having a solid plan and sticking to smart execution strategies will help you get that meat out efficiently and safely.
Pacing and Breaks
When you're carrying 80-100 pounds on your back, rushing is your enemy. Set a slow, steady pace that you can maintain for extended periods. Focus on putting one foot in front of the other, watching your footing, and using trekking poles for stability. Think about a mountaineer's shuffle – small, deliberate steps that conserve energy.
Frequent, short breaks are far more effective than trying to push through until you're completely exhausted. Every 20-30 minutes, drop your pack for a 5-10 minute rest. Use this time to rehydrate, grab a quick snack, adjust your pack straps, and give your muscles a moment to recover. Hydration is absolutely crucial; carry plenty of water or a filter system. Energy levels will drop quickly under such exertion, so having high-energy snacks like nuts, jerky, and energy bars readily accessible in your hip belt pockets can make a huge difference.
Navigating Difficult Terrain with a Heavy Load
Montana's diverse terrain offers plenty of challenges. When navigating steep descents, widen your stance, bend your knees, and let your trekking poles take some of the impact. Control your speed; a heavy pack can easily push you forward, leading to a fall. For ascents, lean slightly forward, taking small steps and utilizing the switchbacks if they exist. Don't be afraid to create your own if the slope is too direct.
Crossing streams or rivers can be particularly hazardous. Unclip your pack's hip belt and sternum strap so you can ditch it quickly if you fall into deep water. Use your trekking poles for balance, and look for wider, shallower sections to cross. When moving through dense timber, avoid trying to push through thick brush with a wide load on your back. It's often more efficient to find a slightly longer, clearer path, even if it means deviating from your direct line. In any difficult terrain, consider communicating with a partner if you have one, using radios or shouts to ensure everyone knows where others are and can offer assistance if needed.
Lone Wolf vs. Team Effort
Hunting solo offers unparalleled freedom and a deeply personal experience, but packing out an elk solo is a beast of a different color. It means multiple trips, often over successive days, and the added mental strain of being alone with such a monumental task. If you plan to hunt solo, be extra diligent in your preparation: pack light, carry extra food and water, have multiple navigation aids, and inform someone of your exact hunting area and expected return time. Our How to Pack Out Elk Meat Solo in Montana guide provides even more specific strategies for this demanding feat.
Hunting with a partner or a group significantly lightens the load, both literally and figuratively. With multiple people, you can distribute the weight, make fewer trips, and have an extra set of hands for quartering, navigating, and managing unexpected situations. The shared camaraderie and motivation can make the grueling work much more bearable. Many groups plan their hunts specifically around having enough manpower for the pack out, understanding that a downed elk is just the beginning of the work. If you're planning a Montana DIY Elk Hunt, consider bringing a buddy.
Post-Pack Out Care: From Mountain to Freezer
Congratulations, you’ve done it! The meat is off the mountain. But the journey from wild game to delicious table fare isn't over yet. Proper post-pack out care is essential to ensure the quality of your harvest endures all the way to your dinner plate.
Immediate Cooling and Transport
As soon as that meat hits the trailhead, or even before if you have a cooler waiting nearby, get it cooled down further. Large coolers packed with ice are your best friend. Drain any standing water from the coolers regularly to prevent the meat from soaking, which can make it mushy and promote bacterial growth. Some hunters use frozen plastic water bottles or even blocks of dry ice (used carefully and not in direct contact with the meat) for extended cooling.
If you have a long drive home, ensure your coolers are well-insulated and strapped down securely. In warmer temperatures, placing a layer of insulation, like sleeping bags or blankets, over the coolers in the bed of a truck can help maintain temperature. The goal is to keep the meat as close to 34-38°F as possible without freezing it solid, allowing it to age slightly and firm up. Once the meat is sufficiently cooled, it will be much easier to handle and process.
Processing Your Own Meat vs. Professional Services
At this point, you have a choice: process the meat yourself or take it to a professional meat processor.
Processing Yourself:
- Pros: Cost savings, complete control over cuts and packaging, and the satisfaction of seeing the entire process through. You learn valuable skills and can ensure every scrap of meat is utilized exactly as you want it.
- Cons: Requires dedicated time, proper equipment (knives, grinder, vacuum sealer, a clean workspace), and a certain level of skill. It can be a very messy and labor-intensive process, especially for a large animal like an elk.
- Considerations: If you're new to processing, start with smaller animals or learn alongside an experienced mentor. Ensure you have a cool, clean space. Many hunters invest in a good grinder like a LEM or Cabela's model for burger and sausage.
Professional Services:
- Pros: Convenience, expertise, and efficiency. They have specialized equipment to handle large game, provide consistent cuts, and can offer services like sausage making, jerky, and specialty cuts. They know how to age meat properly.
- Cons: Cost can be significant, ranging from $150-$400+ depending on the animal size and desired cuts. You relinquish some control over the process, though good communication with your butcher can mitigate this.
- Considerations: Research local Montana processors well in advance. Some popular ones near hunting hotspots, like those in Bozeman, Missoula, or Ennis, can have long wait times during peak season, so call ahead. Ask about their turn-around time, pricing structure, and what they do with undesirable cuts or bones.
Many hunters choose a hybrid approach: they debone the animal in the field, then take the boneless meat to a processor, saving some weight and cost while still getting professional cuts and packaging.
Reflecting on the Effort
After all the sweat, strain, and sore muscles, there’s an immense sense of accomplishment that washes over you. Packing out an elk isn't just about the meat; it's about the full journey. It’s the ultimate culmination of weeks or months of scouting, physical preparation, and mental fortitude. Every meal of elk meat from that animal will taste a little sweeter, knowing the true effort that went into earning it.
This challenging experience creates indelible memories and builds a deeper connection to the land and the wild game it supports. It’s a story you’ll tell for years around the campfire, each time perhaps exaggerating the incline or the weight just a little bit more. Embrace the grind, for it is as much a part of the hunt as the shot itself.
Estimated Elk Quarter Weights for Packing
To give you a better idea of what you might be lifting, here's a general table of estimated bone-in quarter weights for an average mature bull and cow elk. Keep in mind these are approximations and can vary greatly based on the individual animal's size, age, and condition.
| Quarter Type | Average Mature Cow Elk (bone-in) | Average Mature Bull Elk (bone-in) |
|---|---|---|
| Front Quarter | 40 – 60 lbs | 60 – 80 lbs |
| Hind Quarter | 60 – 80 lbs | 80 – 100+ lbs |
| Backstraps | 15 – 20 lbs (total) | 20 – 30 lbs (total) |
| Tenderloins | 5 – 8 lbs (total) | 8 – 12 lbs (total) |
| Neck/Misc. | 20 – 40 lbs | 40 – 60 lbs |
Note: Deboning in the field can reduce these weights significantly, often by 20-30%, but adds to the time spent breaking down the animal on the mountain.
Disclaimer
The information provided in this guide is for general informational purposes only and does not constitute professional advice. Hunting regulations, seasons, and landowner permissions can change. Always consult the official Montana Fish, Wildlife & Parks (FWP) regulations for the current year and obtain all necessary licenses and permits before engaging in any hunting activities. Safety should always be your top priority in the field.