Montana Rifle Elk Hunting Guide
There's nothing quite like the dream of a Montana rifle elk hunt. You've pictured it countless times: crisp mountain air, a majestic bull stepping out of the timber, and the satisfying crack of your rifle. But then reality sets in. The sheer scale of Montana, the complex regulations, and the physical demands can feel incredibly daunting, turning that dream into a mountain of unanswered questions. This comprehensive guide is here to unravel the complexities of rifle elk hunting in Big Sky Country, offering practical advice and seasoned insights to help you prepare for a successful and memorable adventure.
Understanding Montana's Rifle Elk Seasons and Regulations
Navigating Montana's hunting regulations can feel like deciphering an ancient script, especially for those new to the state or nonresident hunters. The Montana Fish, Wildlife & Parks (FWP) sets the rules, and they change periodically, so staying on top of the most current information is paramount. Understanding the nuances of season dates, general tags versus permits, and specific district regulations is the first, crucial step toward a successful rifle elk hunt.
General Rifle Season Overview
For most hunters, the "general rifle season" is the bread and butter of Montana elk hunting. This season typically runs for about five weeks, starting in late October and extending through the Sunday after Thanksgiving. During this period, a vast portion of the state's public land is open to elk hunting with a general elk tag, often acquired through the nonresident combination license draw. It's a busy time, no doubt, but for good reason: the elk are often transitioning from higher summer ranges to wintering grounds, and the rut is over, meaning they’re less vocal but can be found in larger herds. You'll find a wide variety of terrain available during the general season, from accessible national forests to remote wilderness areas. The key is to research specific hunting districts to understand their unique pressures and elk behavior patterns. Don't underestimate the impact of early snowfall or a deep freeze during this window; these weather events can drastically alter elk movement and concentration, sometimes pushing them into more accessible areas or, conversely, locking them down in dense timber. Many hunters will be looking at districts that don't require special permits, focusing instead on areas where a general tag allows access. For a deeper dive, check out our guide on Montana General Rifle Season Dates.
Special Permit Areas and Draw Odds
While a general tag opens up a lot of country, some of Montana's most sought-after elk hunting opportunities lie within specific districts that require a special permit. These are often limited-entry hunts designed to manage herd numbers or trophy potential in particular areas. Obtaining one of these coveted permits means entering the FWP draw, where success can depend heavily on accumulated preference or bonus points, along with sheer luck. Nonresidents often find the draw challenging, as a significant portion of permits are allocated to residents. It's essential to understand the distinction between preference points (which increase your odds sequentially) and bonus points (which give you extra entries into a random draw). Researching draw odds for specific hunting districts (HDs) is a critical part of planning. Many hunters spend years building points for these permits, dreaming of a hunt in an HD known for its mature bulls and incredible scenery. Websites like GoHunt provide valuable data and tools to analyze draw odds, helping you strategize which permits to apply for based on your point totals and desired hunt experience.
Antler Restrictions and Tag Types
Montana utilizes various tag types and antler restrictions to manage elk populations and hunting pressure. The most common general elk tag is often an "either-sex" tag, allowing you to harvest a bull or a cow, but many districts also have specific antler restrictions. These often dictate a minimum number of antler points (e.g., "four-point or better") or an "eyeguard rule," where the brow tines count toward the point total. Understanding these rules before you head into the field is non-negotiable. Mistakes can lead to significant fines and loss of hunting privileges. Beyond the general tag, you might encounter "Elk B" licenses, which are often cow-only tags or antlerless tags designed to help manage herd size in specific areas. These are typically easier to draw, especially for residents, and can provide a great opportunity for meat hunters or those looking to gain experience. Always consult the current FWP regulations for the specific hunting district you plan to hunt, as these rules can vary significantly from one area to another and change annually. Knowing your tag limitations is just as important as knowing your rifle.
Essential Gear for Montana Rifle Elk Hunting
Montana is a land of extremes, and your gear needs to be up to the challenge. From scorching early-season days to brutal blizzards that roll in with little warning, the weather can dictate the success and safety of your hunt. Investing in reliable, high-quality gear isn't just about comfort; it's about survival and ethical hunting. Cutting corners here can put you in a tough spot miles from the nearest road.
Rifle, Ammunition, and Optics Selection
Choosing the right rifle and ammunition for Montana elk is a foundational decision. While personal preference plays a huge role, a rifle chambered in a cartridge suitable for tough, thick-skinned animals at varying distances is key. Calibers like the .30-06 Springfield, .300 Winchester Magnum, 7mm Remington Magnum, and .308 Winchester are perennial favorites, offering a good balance of power, trajectory, and readily available ammunition. For those looking for more punch, calibers like the .338 Winchester Magnum are excellent, especially in thick timber where a close-range shot on a bull might be your only opportunity. Practice extensively with your chosen setup. Knowing your rifle's capabilities and your own limitations at different ranges, especially from various shooting positions (prone, kneeling, off a pack), is far more important than any specific caliber.
Optics are equally critical. A high-quality riflescope with good light gathering capabilities is essential for those low-light moments when elk are most active. Variable power scopes (e.g., 3-9×40, 4-16×50) offer versatility, allowing for wide field-of-view in timber and magnification for longer shots across open parks. Beyond the rifle scope, binoculars (10×42 or 10×50 are popular) and a spotting scope are indispensable tools for glassing vast Montana landscapes. They help you find elk without putting miles on your boots, allowing you to make smarter, more efficient moves. Brands like Swarovski, Zeiss, Vortex, and Leupold offer excellent options that can withstand the rigors of a Montana hunt. Learning How to Use Optics for Montana Mule Deer also applies directly to elk hunting, given the similar terrain challenges.
Here's a quick comparison of some popular rifle calibers for Montana elk:
| Caliber | Common Bullet Weight (gr) | Muzzle Velocity (fps) | Energy at 200 yds (ft-lbs) | Recoil (approx. ft-lbs) | Pros | Cons |
|---|---|---|---|---|---|---|
| .308 Winchester | 150-180 | 2600-2800 | 1800-2200 | 18-20 | Lighter recoil, accurate, sufficient for elk with good shot placement, widely available ammo. | Flatter trajectory at very long ranges is not its strong suit. |
| .30-06 Springfield | 165-200 | 2700-2900 | 2200-2600 | 20-22 | Classic elk cartridge, versatile, excellent all-around performance, good range. | Slightly more recoil than .308. |
| 7mm Remington Magnum | 150-175 | 2900-3100 | 2600-3000 | 22-25 | Very flat trajectory, excellent for long-range shots, plenty of energy. | Higher recoil, more expensive ammo, can be harder to find in some small towns. |
| .300 Winchester Magnum | 180-200 | 2950-3150 | 2800-3200 | 25-30 | Powerful, flat-shooting, excellent for large elk and adverse conditions. | Significant recoil, can be tiring to shoot extensively, premium ammo often required. |
| .338 Winchester Magnum | 200-250 | 2700-2900 | 3000-3500 | 30-35 | Devastating power, especially effective in heavy cover or for less-than-ideal angles. | Heavy recoil, not necessary for most elk scenarios, very specialized. |
Note: Performance can vary based on specific bullet type, barrel length, and load data.
Clothing, Footwear, and Layering Systems
Montana weather can swing wildly, often within the same day. One moment it's sunny and mild, the next a blizzard is rolling in. This is why a proper layering system is absolutely critical. Start with a moisture-wicking base layer (merino wool or synthetic, avoid cotton) to pull sweat away from your body. Next, an insulating mid-layer (fleece or puff jacket) provides warmth. Your outer layer should be waterproof, windproof, and durable to protect against the elements. Good quality rain gear is not optional; it’s a necessity. Think about quiet fabrics, as noise can be a deal-breaker when stalking.
Footwear must be robust, waterproof, and well broken-in. You'll be covering steep, uneven, and often snowy or muddy terrain. Boots with excellent ankle support and aggressive traction are paramount. Brands like Kenetrek and Schnee's, both with strong Montana roots, are popular for their durability and performance in rugged mountain environments. Don't forget quality wool socks (multiple pairs!) to prevent blisters and keep your feet warm even when wet. A good pair of gaiters can also keep snow and debris out of your boots, making your hunt far more comfortable.
Navigation, Safety, and Emergency Supplies
Even with years of experience, a Montana backcountry hunter knows that preparedness is key. Modern GPS devices and smartphone apps like onX Hunt have revolutionized navigation, allowing you to pinpoint your location, track your path, and identify public/private land boundaries with incredible accuracy. However, never rely solely on electronics. Always carry a physical map and compass and know how to use them. Batteries die, and signals disappear.
For safety, a personal locator beacon (PLB) or satellite messenger (like a Garmin inReach or Zoleo) is a non-negotiable item, especially if you're venturing into remote areas or hunting solo. These devices can send emergency signals even without cell service, providing peace of mind for you and your loved ones. Beyond that, a well-stocked first-aid kit, fire starter, headlamp with extra batteries, water filter/purification tablets, emergency blanket, and extra food are absolute must-haves. A small, sharp knife and game bags are also essential for field dressing and packing out your elk. Remember, you are your own first responder in the backcountry. For a comprehensive list, consult our Montana Backcountry Hunting Gear List.
Scouting and Locating Elk Before and During the Hunt
Finding elk in Montana's vast landscapes is often the biggest challenge, especially with a rifle. They blend seamlessly into their surroundings and can cover incredible distances. Effective scouting, both from your computer and on the ground, drastically increases your odds of success. You can't just wander aimlessly; you need a plan based on their habits and habitat.
E-Scouting Montana Units and Topography
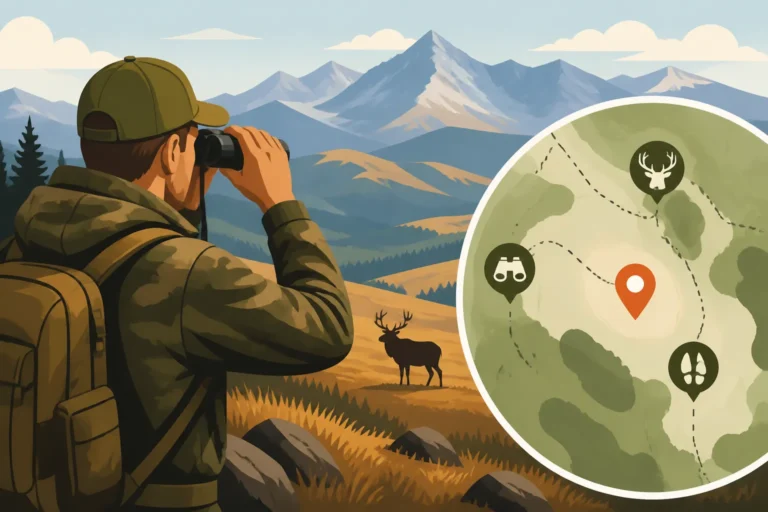
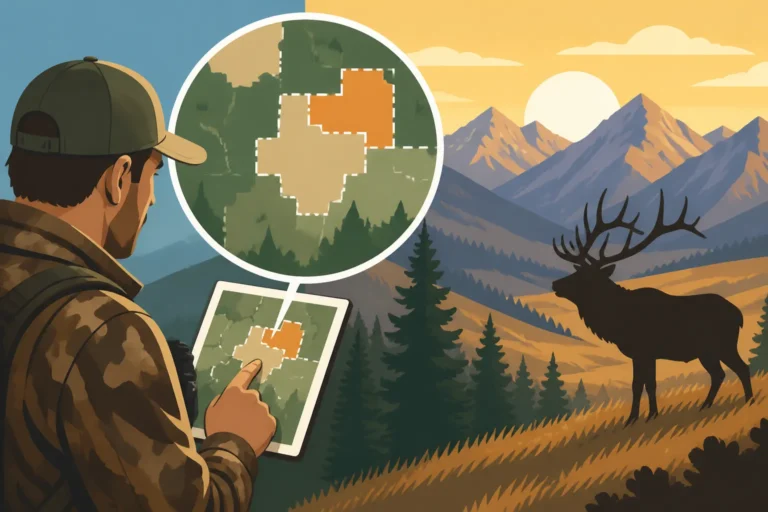
Before you even step foot in Montana, the bulk of your scouting can (and should) be done from home. This is where tools like GoHunt's Insider platform or onX Hunt shine. These applications provide incredibly detailed topographic maps, satellite imagery, public and private land ownership layers, and even historical burn data. You can identify potential bedding areas, feeding grounds, water sources, migration corridors, and escape routes. Look for north-facing slopes with timbered pockets where elk seek shade and security, especially during warmer parts of the season or after a snowfall. Identify saddles, benches, and thick draws that connect different types of terrain—these are often travel routes.
When e-scouting, it’s like putting together a puzzle. Trace potential routes from known elk areas to water or food sources. Identify glassing points that offer expansive views of potential elk habitat. Use the terrain analysis tools to understand elevation changes and steepness. This initial homework allows you to arrive in Montana with a solid game plan, marked waypoints, and a much better understanding of the unit than if you just showed up blind. For a full tutorial, check out How to E-Scout Montana Hunting Units.
Pre-Season Field Scouting Techniques
Nothing beats putting boots on the ground, especially in the weeks or months leading up to the season. If you're a resident or can make an early trip, this is invaluable. Field scouting confirms your e-scouting hypotheses and allows you to understand the terrain in a three-dimensional way that maps can't fully convey. Look for fresh elk sign: tracks, droppings, rubs (where bulls rub their antlers on trees), and wallows. Pay attention to game trails, especially those that appear heavily used.
During pre-season scouting, it's not always about finding elk, but understanding where they will be once hunting season starts. Are they currently high on summer feed? Where will they move when the first snow flies? What are the human pressure points? Identify key access points, potential campsites, and escape routes for the elk. Consider setting up trail cameras in promising areas, particularly near water sources, mineral licks, or natural funnels, to get a better understanding of elk movement patterns and the quality of animals in the area.
Reading Sign and Understanding Elk Movement
Once the season starts, reading elk sign becomes a moment-to-moment skill. Fresh tracks in mud or snow, piles of droppings, fresh rubs, and recently used wallows are all indicators that elk are in the immediate vicinity. Pay attention to the age of the sign; shiny, wet droppings or fresh mud around a wallow mean they were there very recently. Scrapes or broken branches from sparring bulls during the rut can still indicate bull presence even after the rut cools down.
Understanding general elk movement patterns is also critical. Elk are creatures of habit, often moving between bedding areas (dense timber or north-facing slopes for security) and feeding areas (grassy parks, clearcuts, or open ridges) twice a day, usually at dawn and dusk. Weather significantly impacts these patterns. During heavy snow or extreme cold, elk will often seek thermal cover in dark timber or south-facing slopes. High hunting pressure can also drastically alter their behavior, pushing them into the densest, nastiest cover they can find. Learning How to Pattern Montana Elk Movement can give you a significant advantage.
Rifle Elk Hunting Tactics for Different Montana Terrains
Montana's diverse landscape means there's no single "best" way to hunt elk with a rifle. Your tactics need to adapt to the specific environment you're in, whether you're navigating dense timber, glassing vast sagebrush basins, or working through steep drainages. Flexibility and observation are your best friends.
Hunting Timbered Mountains and Dark Timber
Ah, the dark timber. It's where elk feel safest, and where many hunters spend frustrating hours slogging through thick trees. Hunting timber requires a completely different mindset and approach than open country. This is still-hunting territory, moving excruciatingly slowly, one careful step at a time, pausing frequently to listen and scan. Your senses are your primary tools here: listen for the snap of a twig, the rustle of leaves, or the soft blowing of a nervous elk. Smell for that distinct musky elk scent.
Move into the wind or with a crosswind, constantly checking your surroundings. Focus on patches of sunlight, openings, and anything that breaks up the natural patterns of the forest. Elk often bed down just inside the edge of dark timber, so pay close attention to the transitions. Look for horizontal lines (an elk's back or belly) in a world of vertical trees. This is not a high-odds game for spotting, but when you do, it’s often close and intense. When the weather is bad – windy, snowy, or raining – elk are more likely to be bedded in the timber, making it a prime time for this tactic. Knowing How to Find Elk in Montana Dark Timber will be crucial for success.
Navigating Open Country and Sagebrush Basins
Eastern Montana, and even some western mountain valleys, offer expansive, open terrain dominated by sagebrush, grasslands, and scattered timbered draws. This is glassing country. Unlike the timber, where you might get a 50-yard shot, here you might be looking at distances of 200-500 yards or more. The tactic is to find a high point, set up your spotting scope or high-powered binoculars, and systematically "grid" the landscape. Look for patches of color that don't belong, the subtle movement of an ear, or the glint of an antler.
Once you spot elk, the real work begins: planning a stalk. This involves using topography to your advantage, staying out of sight behind ridges, coulees, and draws. Pay obsessive attention to the wind, as it's often swirling and unpredictable in open country. A good rangefinder is indispensable here, not just for the shot, but for judging distances during your stalk. You might hike for an hour or more to get within shooting range, only to have the wind shift or the elk move. Patience is key, and sometimes, backing out and trying another approach is the smartest move. For more details on this tactic, consider our guide on How to Glass Montana's Big Country.
Exploiting Thermal Hubs and Drainage Systems
In mountainous terrain, understanding thermals and drainage systems is paramount, especially during the general rifle season when elk are often moving between feeding and bedding areas. Thermals are air currents that rise as the sun heats the ground in the morning and fall as the air cools in the evening. Elk use these predictable air currents to their advantage, bedding on leeward slopes or in thick timber where their scent carries away from potential predators.
Hunting drainages means systematically working your way through these natural funnels. In the morning, as thermals rise, you might want to hunt downhill or across slopes, keeping your scent from blowing down to elk below you. In the evening, as thermals fall, reversing that approach and hunting uphill can be effective. Elk often use the bottoms of drainages as travel corridors, especially where thick cover provides security. Look for benches or small flats within these drainages where elk might pause to feed or bed. The wind can be tricky in drainages, swirling and changing direction frequently, so constant vigilance and carrying a wind checker are essential. This method is a core component of many successful Montana Public Land Hunting Strategy approaches.
Shot Placement, Ethics, and Tracking Wounded Elk
Making an ethical shot and ensuring a quick, humane kill is the highest responsibility of any hunter. Rifle hunting for elk demands precision, patience, and a deep understanding of elk anatomy. When things don't go perfectly, knowing how to track a wounded animal is equally vital.
Ethical Shot Placement and Angles
The ideal shot placement for elk is typically the "boiler room"—the lung and heart area, just behind the shoulder. This vital zone offers a large target and ensures a quick, humane kill. A double-lung shot causes massive hemorrhaging, leading to rapid expiration. A heart shot is even quicker but presents a smaller target. Avoid "Texas heart shots" or shots aimed solely at the spine or head, as these are often unreliable and unethical.
Angles are crucial. A broadside shot is generally the easiest and most effective. For quartering-away shots, aim to hit the vitals by passing through the animal's opposite shoulder. Quartering-to shots are much trickier and often best avoided unless you are extremely confident in your ability to penetrate heavy bone and still hit vitals. Never take a shot at a running animal unless you are absolutely proficient and the animal is very close; the risk of wounding is too high. Always have a clear lane of fire, be aware of what's behind your target, and know your effective range. If you have any doubt about making a clean kill, don't take the shot.
The Importance of Patient Tracking
Even with a perfect shot, an elk might not drop immediately. The adrenaline rush can carry them a surprising distance. If your elk doesn't go down within sight, resist the urge to immediately rush in. Your first step should be to mark the exact spot where the elk was standing when you shot and where you last saw it. Then, sit down, collect yourself, and wait. A minimum of 30 minutes for a good lung shot, and often an hour or more for a questionable hit, is recommended. This allows the animal to lay down, stiffen up, and bleed out. Pushing a wounded elk too soon can cause it to run further, making recovery significantly harder.
During this waiting period, mentally replay the shot. What was the animal's reaction? Did it flinch, kick, hunch up, or bolt? What sound did the bullet make? A "thump" often indicates a solid hit. Note the time and your exact location. When you do begin tracking, move slowly and deliberately.
Recovering Elk in Challenging Conditions
Tracking a wounded elk in Montana can be incredibly challenging. Snow makes it easier, as blood trails are more visible. But in dry conditions, or if the elk has moved into dense timber, it can be a painstaking process. Look for blood, broken branches, disturbed leaves, tracks, and even strands of hair from where the bullet struck. Mark your trail with flagging tape or by breaking small branches, especially in thick cover. This helps you avoid getting lost and allows you to retrace your steps if you lose the trail.
If the blood trail dwindles, expand your search in circles or grids around the last sign. Elk will often try to travel downhill, or seek out thick cover to bed down in. Be prepared to follow a trail for hours, sometimes even overnight. A good headlamp is indispensable for tracking in low light. If darkness falls and you haven't recovered the animal, mark the last sign, backtrack to a safe place, and return at first light with fresh eyes and possibly more help. A lost elk is every hunter's worst nightmare, so do everything in your power to make a clean shot and meticulously recover your animal.
Physical and Mental Preparation for a Montana Elk Hunt
Montana elk hunting isn't a stroll in the park. It's physically demanding, mentally taxing, and can push you to your limits. Neglecting your fitness or mental game can turn an incredible opportunity into a miserable experience. Preparing your body and mind is just as important as preparing your gear.
Building Stamina and Mountain Endurance
Elk live in rugged country, and a successful hunt often means covering miles of steep, uneven terrain at high altitudes. Building your stamina and endurance is non-negotiable. Start your fitness regimen months before your hunt. Focus on cardiovascular fitness: running, hiking, rucking with a weighted pack, and cycling are all excellent. Incorporate elevation gain into your workouts. If you live in a flat area, find stairs, stadium bleachers, or use a stair climber at the gym.
Leg strength is also critical for climbing and descending steep grades, especially when carrying a heavy pack. Include exercises like squats, lunges, and step-ups. Don't forget core strength, which helps with stability and prevents injury, particularly when traversing side-hills or packing heavy loads. Simulating hunting conditions during your training, such as hiking uneven trails with your hunting boots and a loaded pack, will make a huge difference. Our Montana Elk Hunt Fitness Plan provides a great starting point for aspiring elk hunters.
Mental Fortitude and Resilience
Beyond the physical, elk hunting tests your mental toughness. You'll face frustrating setbacks: blown stalks, missed opportunities, brutal weather, and days without seeing a single animal. It's easy to get discouraged, question your abilities, or want to quit. This is where mental fortitude comes in. Cultivate patience, persistence, and a positive attitude. Remind yourself that the challenge is part of the allure.
Practice visualization, imagining successful stalks and ethical shots. Learn to manage discomfort; accept that you'll be cold, wet, tired, and sore. Focus on the process, not just the outcome. Celebrate small victories, like finding fresh sign or executing a difficult hike. A strong mind can push a tired body further than you think, and the resilience you build will serve you well, not just in the mountains, but in life.
Nutrition and Hydration in the Field
Proper nutrition and hydration are the fuel for your body's engine, especially when burning thousands of calories daily in the mountains. Dehydration can quickly lead to fatigue, headaches, and impaired judgment, which are dangerous in the backcountry. Carry ample water, or a reliable water filter/purifier if you'll be near natural sources. Aim to drink several liters throughout the day, even if you don't feel thirsty.
For food, focus on nutrient-dense, calorie-rich options that are lightweight and easy to prepare. Dehydrated meals are great for dinner, but snacks like trail mix, jerky, energy bars, nuts, and dried fruit are crucial for consistent energy throughout the day. Pack enough food for unexpected extra days in the field, just in case. Planning your meals and snacks carefully will ensure you have the energy needed to push through long days and make smart decisions when it counts.
Field Dressing, Packing Out, and Meat Care
The shot is just the beginning of the real work. Field dressing, breaking down, and packing out an elk is a monumental task, especially if you're deep in the backcountry. This is where preparation and efficiency truly pay off. Proper meat care is not just about preserving your harvest; it's a testament to ethical hunting.
Efficient Field Dressing Techniques
Once your elk is down, the clock starts ticking, especially if temperatures are warm. The goal of field dressing is to remove the entrails as quickly and cleanly as possible to allow the carcass to cool. Roll the elk onto its back if possible. Make a careful incision from the sternum to the pelvis, cutting around the anus. Cut through the diaphragm to access the chest cavity. Reach deep to sever the esophagus and windpipe, then carefully roll out all the entrails. Be careful not to puncture the stomach or intestines, as this can contaminate the meat.
Many hunters prefer the "gutless method" for backcountry elk, which involves quartering the animal and removing the meat without opening the body cavity. This significantly reduces weight and mess, and can be done with the elk lying on its side. Regardless of method, remove the heart and liver if you plan to keep them. Once gutted, prop the cavity open with sticks and elevate the elk slightly off the ground to promote airflow and cooling.
Strategies for Packing Out an Elk
Packing out an entire elk, especially solo, is a herculean effort. An average bull elk can yield 200-300 pounds of boned-out meat, plus the hide and antlers. This will require multiple trips and a strong pack frame. Most hunters will bone out the meat in the field to reduce weight. Separate the four quarters, backstraps, tenderloins, neck meat, and any other desirable cuts. Place all meat in breathable game bags, never plastic bags, as plastic traps heat and promotes spoilage.
If you're hunting with a partner or a team, you can divide the load, with each person carrying a quarter or a portion of the meat, plus their gear. If solo, you'll need to make multiple trips, caching meat in a cool, shaded spot (or hanging it in a tree, if possible, to deter scavengers) between trips. A good pack frame, like those from Mystery Ranch, Stone Glacier, or Kifaru, is essential for comfortably carrying heavy, awkward loads. Pacing yourself, staying hydrated, and being mindful of your footing are critical when packing out. For detailed strategies, see our guide on How to Pack Out an Elk in Montana.
Keeping Meat Cool in the Backcountry
Cooling the meat rapidly is paramount to prevent spoilage and ensure quality table fare. After field dressing, get the meat into game bags and out of direct sunlight as quickly as possible. If temperatures are above freezing, hanging the meat in a shady, airy spot is ideal. Some hunters will even use small, battery-operated fans if they have a base camp setup. If you have ice, you can strategically place it in coolers with the game bags for the trip home, ensuring it never directly touches the meat.
Even in cold weather, it's important for the meat to cool down. Don't pile meat together, as this insulates it and prevents cooling. Space it out. On extended backcountry hunts, sometimes burying game bags in snow banks can provide natural refrigeration. The goal is to get the internal temperature of the meat down as quickly and efficiently as possible. This careful handling in the field directly translates to better tasting meat on your dinner plate.
Disclaimer
Please be aware that hunting regulations, season dates, and license requirements in Montana can change annually. It is your sole responsibility to consult the most current Montana Fish, Wildlife & Parks (FWP) regulations prior to engaging in any hunting activities. This guide provides general information and should not be considered a substitute for official FWP publications or legal advice. Always prioritize safety, ethical hunting practices, and responsible outdoor recreation.