How to Quarter an Elk in the Montana Backcountry
You've just anchored the shot, and that majestic Montana bull or cow is finally on the ground, deep in the wilderness you worked so hard to reach. That initial rush of adrenaline and relief is incredible, isn't it? But then, the reality sets in: the hardest part of the hunt has only just begun. Getting that animal quartered and off the mountain is a grueling, often underestimated task, and doing it right in the backcountry is absolutely critical for preserving your hard-won meat. This guide is all about equipping you with the knowledge and confidence to tackle this physically demanding yet immensely rewarding process, ensuring every ounce of that delicious elk meat makes it home.
Essential Preparations Before the Cut
Putting an elk on the ground in the vastness of Montana's backcountry is just the first step in a long, arduous, but incredibly rewarding journey. Before you even think about unsheathing your knife, a solid plan and the right gear are paramount. Rushing into the process without these considerations can lead to wasted meat, unnecessary exertion, and even dangerous situations. Taking a moment to breathe, assess, and prepare will pay dividends.
Critical Gear Checklist for Field Quartering
You wouldn't head out on a multi-day hike without a backpack, and you shouldn't approach field quartering an elk without the proper tools. This isn't just about having a knife; it's about having the right tools for the job, in good condition.
First and foremost, your knife. You'll want at least two, preferably three, extremely sharp, fixed-blade knives. A good boning knife with a thinner, flexible blade is excellent for separating meat from bone, while a sturdier drop-point or gut hook blade can handle the initial skinning and tougher cuts. Don't forget a way to keep them razor sharp throughout the process – a small sharpening steel, a ceramic rod, or even a compact sharpening stone is a must. There's nothing more frustrating, or dangerous, than trying to work with a dull knife when you're tired and covered in blood. Beyond knives, a small, lightweight game saw can be a huge time-saver if you plan to split the pelvis or sternum, though the gutless method often avoids this need.
Next, you need protection for your meat. Quality game bags are non-negotiable. Forget canvas sacks; you need breathable, synthetic game bags that protect the meat from flies, dirt, and debris while allowing it to cool. Brands like Kuiu and Argali make excellent options. Make sure you have enough for all four quarters, the backstraps, tenderloins, neck meat, and any other boned-out trim you want to keep. You’ll also need paracord or rope to hang these bags once the meat is secured, allowing air circulation and keeping it away from ground predators. A good headlamp, with fresh batteries, is absolutely essential, even if you think you'll be done by dark. Time has a way of slipping away, especially when you're working against the clock.
Finally, don't forget personal safety and comfort items. Latex or nitrile gloves will keep your hands clean and prevent contamination of the meat, especially if you have any small cuts. Plenty of water is a must – this is strenuous work, and dehydration can set in quickly in the high country. Bear spray, easily accessible, is non-negotiable in Montana's grizzly country. And a basic first-aid kit should always be with you for those inevitable nicks and scrapes. For a more exhaustive list, refer to a comprehensive Montana Backcountry Hunting Gear List.
Pre-Shot Considerations and Kill Site Assessment
It's easy to get tunnel vision when an elk is in your sights, but if you have a moment, try to think about the recovery. Dropping an elk on a relatively flat, open spot is ideal. This makes positioning the animal for quartering much easier than trying to work on a steep slope or in thick timber. Of course, you can't always choose, and often, an elk will expire in the least convenient spot imaginable.
Before you even take the shot, or immediately after if you have cell service, take a moment to pull out your mapping application. Many hunters rely on tools like onX Hunt, but platforms like GoHunt also offer incredible e-scouting capabilities that are invaluable once an animal is down. Use it to mark the exact location of the animal. Then, zoom out and assess the surrounding terrain. Are there any natural benches or flatter areas nearby you could move the animal to if necessary? What's the easiest, safest route to get the meat out? Are there any game trails or old logging roads that could simplify the pack-out? Knowing your egress points and potential game retrieval challenges, which you can map out precisely with tools like GoHunt, will save you a lot of grief. A robust e-scouting strategy, often leveraging features found in platforms like GoHunt, can illuminate potential bottlenecks or ideal quartering spots before you even leave home. This foresight can transform a nightmare pack-out into a manageable one, even if you have to move the elk a short distance to a better location for processing.
Safety First and Foremost
Backcountry elk hunting is inherently challenging, and the recovery process adds another layer of risk. Your safety, and the safety of your hunting partners, must always be your top priority.
First, and perhaps most critical in Montana, is bear awareness. Once an animal is down, especially a large one like an elk, it becomes a beacon for predators, particularly grizzly bears. Have your bear spray readily accessible, not buried in your pack. Make noise as you approach the animal, and continue to be vocal throughout the quartering process. Scan your surroundings constantly. If you're with a partner, designate one person to keep watch while the other works. If you encounter a bear, especially a grizzly, back away slowly, speak calmly, and be prepared to use your spray. Sometimes, it's safer to leave the animal overnight and return with more people and a better plan, though this always carries the risk of significant meat loss or further bear activity. Always notify someone of your hunting location and estimated return time. If something goes wrong, help needs to know where to find you. This is also why a satellite messenger or inReach device is a crucial piece of Montana Backcountry Hunting Gear List.
Beyond wildlife, the physical demands of quartering and packing an elk are immense. Be aware of your own limits. Working with sharp knives, especially when tired and cold, increases the risk of injury. Take breaks, stay hydrated, and don't rush. The terrain itself can be treacherous – steep slopes, loose rock, slippery ground. Watch your footing, especially when carrying heavy loads. If you're hunting solo, these safety considerations become even more critical. Make sure you understand Montana Backcountry Hunting Safety Tips before you head out.
| Item | Purpose | Notes |
|---|---|---|
| Fixed-Blade Knife (x2) | Skinning, precise cuts, general butchering | Keep razor sharp; backup is crucial |
| Sharpening Stone/Steel | Maintaining blade sharpness | A dull knife is dangerous and inefficient |
| Game Bags (4-6) | Protecting meat from elements, bugs, dirt | Breathable, synthetic; enough for quarters, backstraps, trim |
| Paracord/Rope | Hanging meat, securing bags | Essential for cooling and keeping off the ground |
| Headlamp | Illumination in low light or darkness | Crucial for extended processing; spare batteries |
| Nitrile Gloves | Hygiene, preventing contamination | Prevents blood-borne pathogen exposure |
| Bear Spray | Self-defense against aggressive wildlife | Readily accessible, know how to use it |
| First-Aid Kit | Treating minor cuts and injuries | Basic essentials for field mishaps |
| Water & Snacks | Sustaining energy and hydration | Quartering is physically demanding work |
| Mapping App (GoHunt) | Marking kill site, planning pack-out routes | Invaluable for navigation and efficient meat retrieval |
| Bone Saw (Optional) | Splitting sternum/pelvis (less common with gutless) | Can be helpful but often not necessary with the gutless method |
Mastering the Gutless Method for Backcountry Elk
When you're miles deep in Montana's rugged terrain, a traditional field dressing method – one that involves opening the body cavity and removing the guts – often presents more problems than it solves. It's messy, adds unnecessary weight, exposes more meat to potential contamination, and significantly increases the risk of attracting bears. This is where the gutless method shines. It's arguably the most efficient and practical way to quarter an elk in the backcountry, allowing you to quickly get the prime meat off the animal and into your game bags, ready for the journey home.
Positioning the Animal and Initial Cuts
The first step, once you've confirmed the animal is expired and safe to approach, is to get it into the best possible position. Ideally, you want the elk lying on its side. If it's on its belly, you'll need to roll it. Use gravity to your advantage if possible, carefully maneuvering it down a slight slope. If it's on a steep slope, position it so its back is uphill, which will make working on the downhill side much easier. Once it's on its side, find a solid stick or log to prop against its ribcage on the uphill side. This will keep it from rolling back onto its belly while you work.
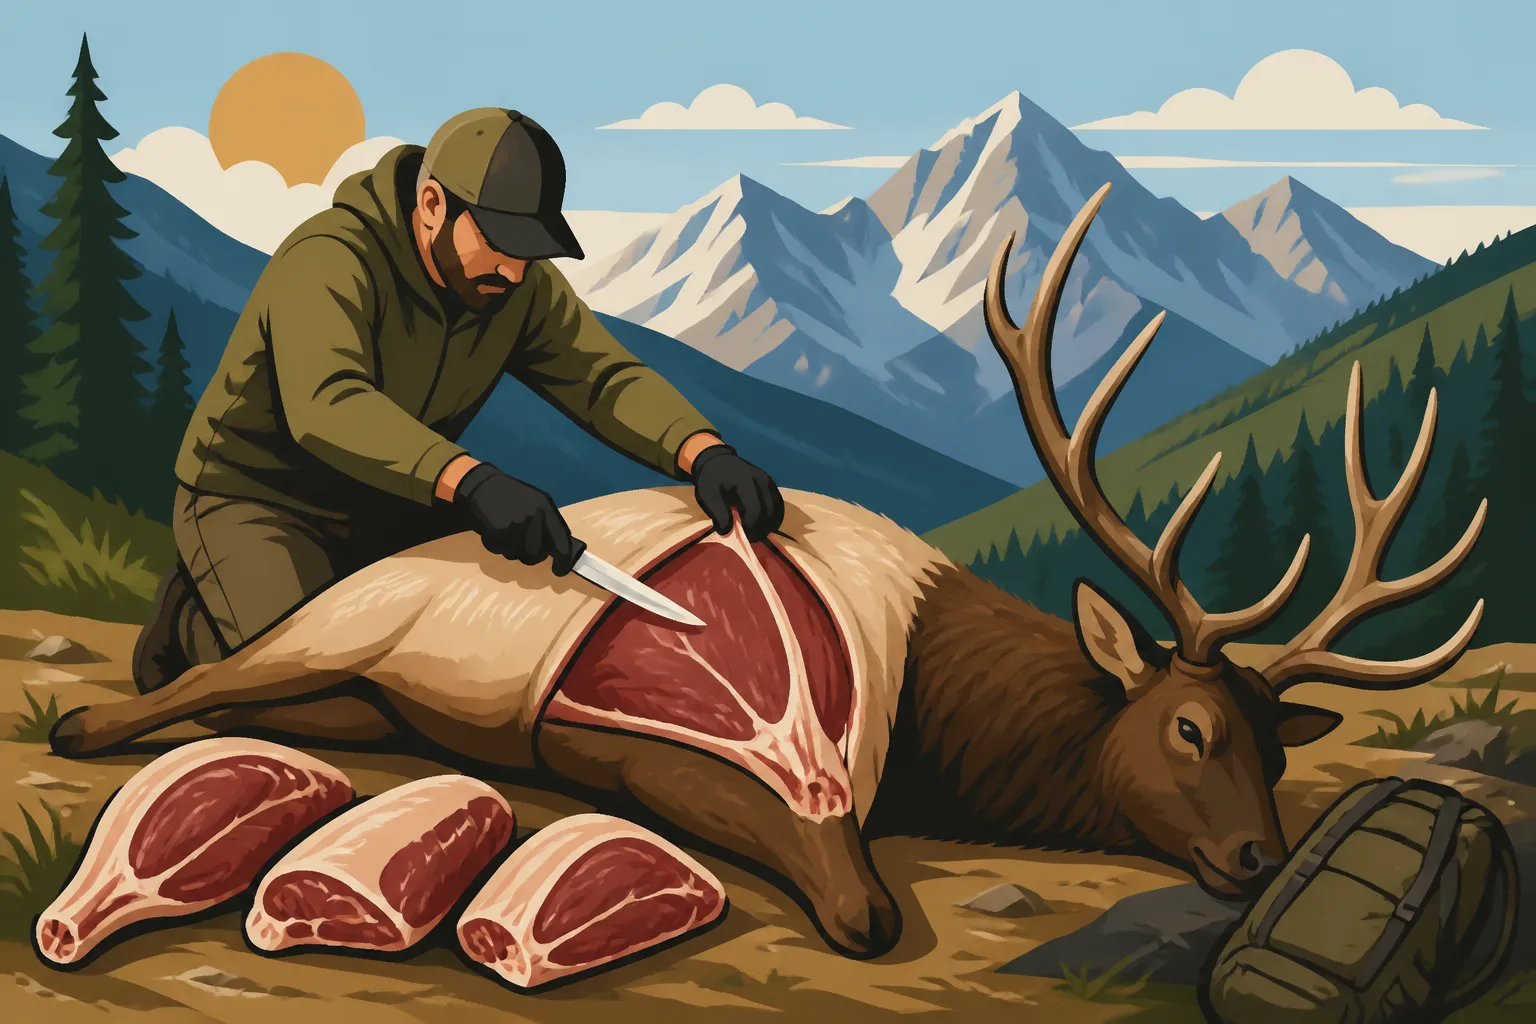
Now for the initial cuts. Start by making a long incision from the armpit straight back to the hindquarter, along the midline of the side facing up. This primary cut will serve as your guide. Next, make a cut around the circumference of the leg, just above the knee joint on both the front and back leg. Then, connect these leg cuts to your initial midline incision. This creates a large flap of hide. Carefully begin skinning, pulling the hide back with one hand while using your sharp knife to separate the hide from the muscle with the other. Keep your blade angled slightly upward, cutting the connective tissue rather than into the meat or the hide itself. Work slowly and methodically, peeling back the hide until the entire upper side of the elk is exposed, from neck to hindquarter. Be careful to keep the meat as clean as possible, avoiding hair contamination.
Removing the Quarters and Backstraps
With one side of the elk fully skinned, it's time to start removing the meat. This is where the gutless method truly shines. You'll work on one side at a time, removing the front shoulder, hindquarter, and backstraps, all without ever opening the body cavity.
Start with the front shoulder. It's not attached by bone to the main skeletal structure, but rather by muscle and connective tissue. Begin by pulling the leg away from the body. You’ll see a natural seam where the shoulder meets the ribcage. Follow this seam with your knife, cutting through the muscle and tissue until the shoulder detaches. Once it's free, you can bone it out further if you prefer, removing the scapula and humerus to save weight, or you can keep it bone-in if your pack and packing strategy allow. For most backcountry hunts, boning out is the way to go to reduce weight and bulk. Place the separated shoulder meat into a clean game bag immediately.
Next, move to the hindquarter. This one is attached by a ball-and-socket joint to the pelvis. Begin by cutting around the hip bone, separating the large muscles that connect the hindquarter to the body. You’ll need to work your knife deep into the hip socket to sever the ligaments and connective tissue holding the joint together. Once the joint is free, the hindquarter will pull away. Again, you can bone it out by separating the femur from the major muscle groups, or keep it bone-in. Often, hunters will make a long cut along the femur and carefully separate the large muscle groups, then remove the bone. This significantly reduces weight for the pack-out. Place this meat into another game bag.
Finally, the backstraps – these are some of the most prized cuts. They run along the elk's spine, just above the ribs. Start at the neck end, making a cut along the top of the spine. Then, make a second cut along the top of the rib cage, following the natural curve of the ribs down towards the spine. Using your knife, carefully separate the backstrap from the spine and ribs, working your way down towards the hindquarters. You'll literally peel it off the bone. Once one entire backstrap is removed, place it in its own game bag. The tenderloins, often considered the most delicious cut, are inside the body cavity. To get them without gutting, you can reach inside the cavity from the side where you've removed the hindquarter, or carefully make a small incision along the flank and reach in to retrieve them. This requires a bit of finesse and a good understanding of anatomy. For those deep in the wilderness, getting these inner cuts is often worth the extra effort.
Flipping and Repeating
With one entire side processed, it’s time for the big flip. This is often the most physically demanding part, especially with a large bull. If you have a hunting partner, work together. If you’re solo, you’ll need to use leverage. Roll the elk onto its already-processed side, which should now be against the ground. This exposes the unskinned side. Use the same propping stick or log to secure it.
Now, you simply repeat the entire process on the second side. Make the primary incision, skin out the hide, and then remove the front shoulder, hindquarter, and backstrap. As you work, remember that time is of the essence, especially in warmer weather or if you're dealing with early season heat in Montana. Getting the meat off the animal and into game bags quickly helps it start cooling.
Harvesting Remaining Meat and Preparing for Pack Out
Don't forget the neck meat and any other trim. The neck on an elk can yield a substantial amount of delicious stew or grind meat. Carefully bone out the muscle groups from the neck, cutting as much clean meat as you can. Any larger pieces of clean meat from the ribcage or flanks should also be removed. This extra effort ensures you're honoring the animal by utilizing as much as possible. Place all these smaller pieces into their own game bag.
If you harvested a bull with antlers, and you plan to keep the skull, you’ll need to cape it out. This involves skinning the hide from the neck and head, taking care around the eyes, ears, and mouth. The skull plate can be removed separately from the rest of the skull later, or you can take the entire head if you're up for the weight. Remember, the skull and antlers add significant weight to your load. After all the meat is bagged, make sure to find solid, shady spots to hang your game bags. This is crucial for cooling the meat and protecting it from scavengers.
Protecting Your Harvest and Strategic Pack-Out
You’ve put in the grueling work of quartering, and now you have beautiful, hard-earned elk meat in your game bags. The battle isn't over yet, though. The next critical phase is ensuring that meat stays cool, clean, and safe during storage and transport. This is especially true for Montana Backcountry Hunting Guide, where warm weather can spoil meat quickly, and long distances often need to be covered.
Proper Meat Care in the Field
Getting the meat into game bags is just the first step in preservation. The goal now is to cool the meat down as rapidly and efficiently as possible. Heat is the enemy of fresh meat, and improper cooling can lead to spoilage, even in cooler weather.
Once each quarter, backstrap, and bag of trim is in its respective game bag, the absolute best thing you can do is hang them. Find sturdy trees with branches high enough to keep the meat off the ground and away from potential scavengers. This allows maximum air circulation around each bag, which is vital for dissipating body heat. In shaded timber, the ambient air temperature, combined with a gentle breeze, will work wonders to form a "rind" on the meat, protecting it from bacteria. The colder the temperature, the faster and more effectively the meat will cool. Pay close attention to the weather forecast and ambient temperatures, especially if you're hunting in the early archery season. Understanding How to Keep Elk Meat Cool in Montana's Early Season is paramount. If temperatures are warm, often above 40-50°F, you need to prioritize getting that meat out quickly, even if it means lighter, more frequent loads.
If hanging isn't an option due to lack of suitable trees or other factors, lay the meat bags out on tarps or ponchos, ensuring they are separated from each other to maximize airflow. Never pile them together, as this traps heat and accelerates spoilage. Keep them out of direct sunlight at all costs. Sometimes, especially when it's still warm, you might even consider dousing the bags with cool water if you're near a stream, though you must then ensure they can dry out quickly to avoid moisture-related spoilage. The key is to manage the internal temperature of the meat; the faster it drops, the better its quality will be when you get it home.
The Pack-Out Strategy
Now comes the truly Herculean task: getting that meat from the kill site to your vehicle or camp. This is where your pre-shot planning and your physical conditioning really come into play. A typical adult cow elk can yield 150-200 pounds of boned-out meat, and a bull can easily top 250-300 pounds. That's a lot of weight to carry out of the backcountry. This is why it’s always smart to have a plan for How to Pack Out an Elk in Montana before you ever head into the woods.
If you're hunting with a partner or a group, divide the load as evenly as possible. Each person should carry a quarter, or a heavy load of boned-out meat, along with their personal gear. For a solo hunter, this often means multiple trips. You might take out a front shoulder and a backstrap on your first trip, return for the hindquarters, and then come back one more time for the final meat and the head/antlers if you're taking them. Cache your meat safely between trips by hanging it high, away from the immediate kill site, and potentially covering it with a tarp to deter birds and small scavengers, or applying a pepper-based deterrent to the game bags (though be mindful of your own scent when you return).
Your backpack is your most important tool during the pack-out. You absolutely need a quality, external or internal frame pack designed for carrying heavy loads. A flimsy daypack simply won't cut it and will likely injure you. Look for packs with robust frames, comfortable hip belts, and adequate compression straps to stabilize the load. For a deeper dive into pack choices, check out Best Backpack for a Montana Elk Hunt. Load the heaviest items – the meat – closest to your back and high up in the pack. This distributes the weight more effectively, making it easier to maintain your balance. Secure everything tightly to prevent shifting, which can throw you off balance and cause chafing or injury.
Navigating the Terrain with a Heavy Load
Walking out with 80-100 pounds of meat on your back is a completely different experience than hiking in with a light daypack. Every step is a conscious effort. This is where How to Physically Prepare for a Montana Elk Hunt becomes incredibly relevant. You'll move slower, your balance will be compromised, and every incline will feel like a mountain.
Pay extreme attention to your footing. Look for the path of least resistance, even if it adds a little distance. Avoid unnecessary climbs or descents if flatter ground is available. Use trekking poles for added stability, especially on uneven or slippery terrain. Descending with a heavy load is often harder on your knees and back than ascending, so take it slow and deliberately. If you planned your route with a mapping app like GoHunt, stick to it. You don't want to get lost or take a wrong turn when you're exhausted and loaded down. Be especially cautious if you're packing out after dark. Even with a good headlamp, shadows can play tricks, and obstacles are harder to see.
If you're hunting in a remote area, perhaps one covered in How to Hunt Elk in Montana's Wilderness, the pack-out can take days. Plan accordingly, carrying enough food, water, and emergency supplies for potential overnight stays. It's a true test of grit and determination, but bringing home that hard-earned wild meat makes every painful step worth it.
Avoiding Common Mistakes and Troubleshooting
Backcountry elk hunting is an inherently challenging endeavor, and quartering an elk under demanding conditions can lead to mistakes. Even seasoned hunters can run into unexpected problems. Knowing what to watch out for and how to troubleshoot common issues can save you a lot of headache, heartache, and most importantly, meat.
The "Oops" Moments in the Field
It's easy to get caught up in the excitement or the rush, and let's face it, field conditions are rarely ideal. One of the most common "oops" moments is trying to work with a dull knife. We covered this in the gear section, but it bears repeating. A dull knife makes every cut harder, slower, and more dangerous. It can slip, causing injury, or tear at the meat, making messy cuts that are harder to clean. Always have a sharpening tool and use it frequently.
Another common oversight is not bringing enough game bags. You think you'll just need four for the quarters, but then you realize you've got two backstraps, two tenderloins, and a pile of neck and rib meat. Suddenly, you're scrambling, trying to wrap meat in spare shirts or trash bags, which is far from ideal for cleanliness and cooling. Always err on the side of bringing too many game bags. They're lightweight and compact.
Forgetting water is another critical error. Quartering an elk is strenuous, full-body work. You'll be sweating, even in cool temperatures. Dehydration can lead to fatigue, poor judgment, and increased risk of injury. Always have a hydration pack or multiple water bottles, and consider a water filter for refills if you're near a reliable source.
Finally, not paying attention to hygiene can lead to spoiled meat. Getting hair on the meat is a classic blunder. The hide is covered in bacteria, and hair clinging to the meat is a surefire way to introduce contaminants. Skin carefully, pull the hide away from the meat, and if hair does get on a cut, meticulously pick it off. Wearing gloves and keeping your work area as clean as possible, even in the dirt, makes a big difference.
Dealing with Unexpected Challenges
Montana's backcountry is a wild place, and it often throws curveballs. You might start quartering in clear skies, only for a sudden snowstorm to roll in, making conditions miserable and meat care tricky. If heavy precipitation starts, try to cover the exposed meat with a lightweight tarp or even the hide itself, but ensure there’s still some airflow. Wet meat can spoil if it doesn’t dry out, so protecting it from rain and snow is crucial, as is keeping it from getting too cold too quickly before body heat has dissipated.
Darkness is another frequent challenge. Even if you plan to be done by sunset, an unexpected issue or just the sheer scale of the task can mean you're working into the night. This is why a reliable headlamp with fresh batteries, and a backup, is non-negotiable. Trying to quarter an elk in the dark without adequate light is dangerous and leads to poor cuts.
Then there are predators. Hearing a growl or seeing eyes reflecting in your headlamp beam is terrifying when you're focused on an elk. As mentioned earlier, constant vigilance and bear spray are key. If bears are actively trying to access the carcass, it might be safer to leave the meat, retreat, and return the next morning with more people. Sometimes, that means losing some meat, but your safety is always paramount. In areas with wolves or coyotes, hanging meat high is even more critical.
Ensuring Cleanliness and Preservation
Ultimately, the goal of quartering is to get clean, edible meat home. This means taking every step to prevent contamination and facilitate proper cooling.
Preventing hair on the meat is a major factor. The moment the hide is separated, it's a source of potential contamination. Always cut away from the hair, and if possible, use the hide itself as a clean surface to lay the quarters on as you work, but never directly on the hide with the hair side up. Designate a "clean" space for your game bags and processed meat.
Keeping the meat cool cannot be overemphasized. In warmer early season hunts, time is your biggest enemy. If you're in a high-elevation, north-facing slope with shade, you have an advantage. If you're down low in a sunny draw, you need to work faster and potentially make more trips to get that meat to a cooler environment. Even in cold weather, if the quarters are stacked or not allowed to cool properly, the inner meat can still spoil from its residual body heat. Spread them out, hang them, and let the Montana mountain air do its work.
Consider the transport process itself. Once you get the meat to your vehicle, it should go immediately into coolers filled with ice. Drain the water daily, as standing water can degrade meat quality. If you have a long drive home, dry ice can be an excellent option for long-term chilling.
By taking these precautions and being prepared for the unexpected, you'll not only successfully quarter your Montana elk but also ensure that your efforts result in high-quality, delicious wild game meat for your table. It's a testament to your hunting skill, your grit, and your respect for the animal.
Disclaimer
Please note that hunting regulations, seasons, and requirements can change frequently. Always consult the most current Montana Fish, Wildlife & Parks regulations and local land management agency rules before planning any hunting trip. Safety should always be your top priority in the field.